How to Set Up and Use the Mullvad VPN Mobile App
Introduction
Your phone is probably the single most critical device when it comes to personal data collection. It probably knows more about your daily life than you do!
Think about it: it follows you between home, work, cafés, hotels, and public networks, while most of the apps on it constantly connect to services on the Internet without you even noticing it, sending precious data back to their creators' servers.
All of this traffic goes through your mobile carrier, which is the company that enables your smartphone to connect to the Internet wherever you are. Every website you visit, every app that phones home, and every background sync passes through infrastructure that can reveal far more about your habits, your routines, and your location than most people realize.
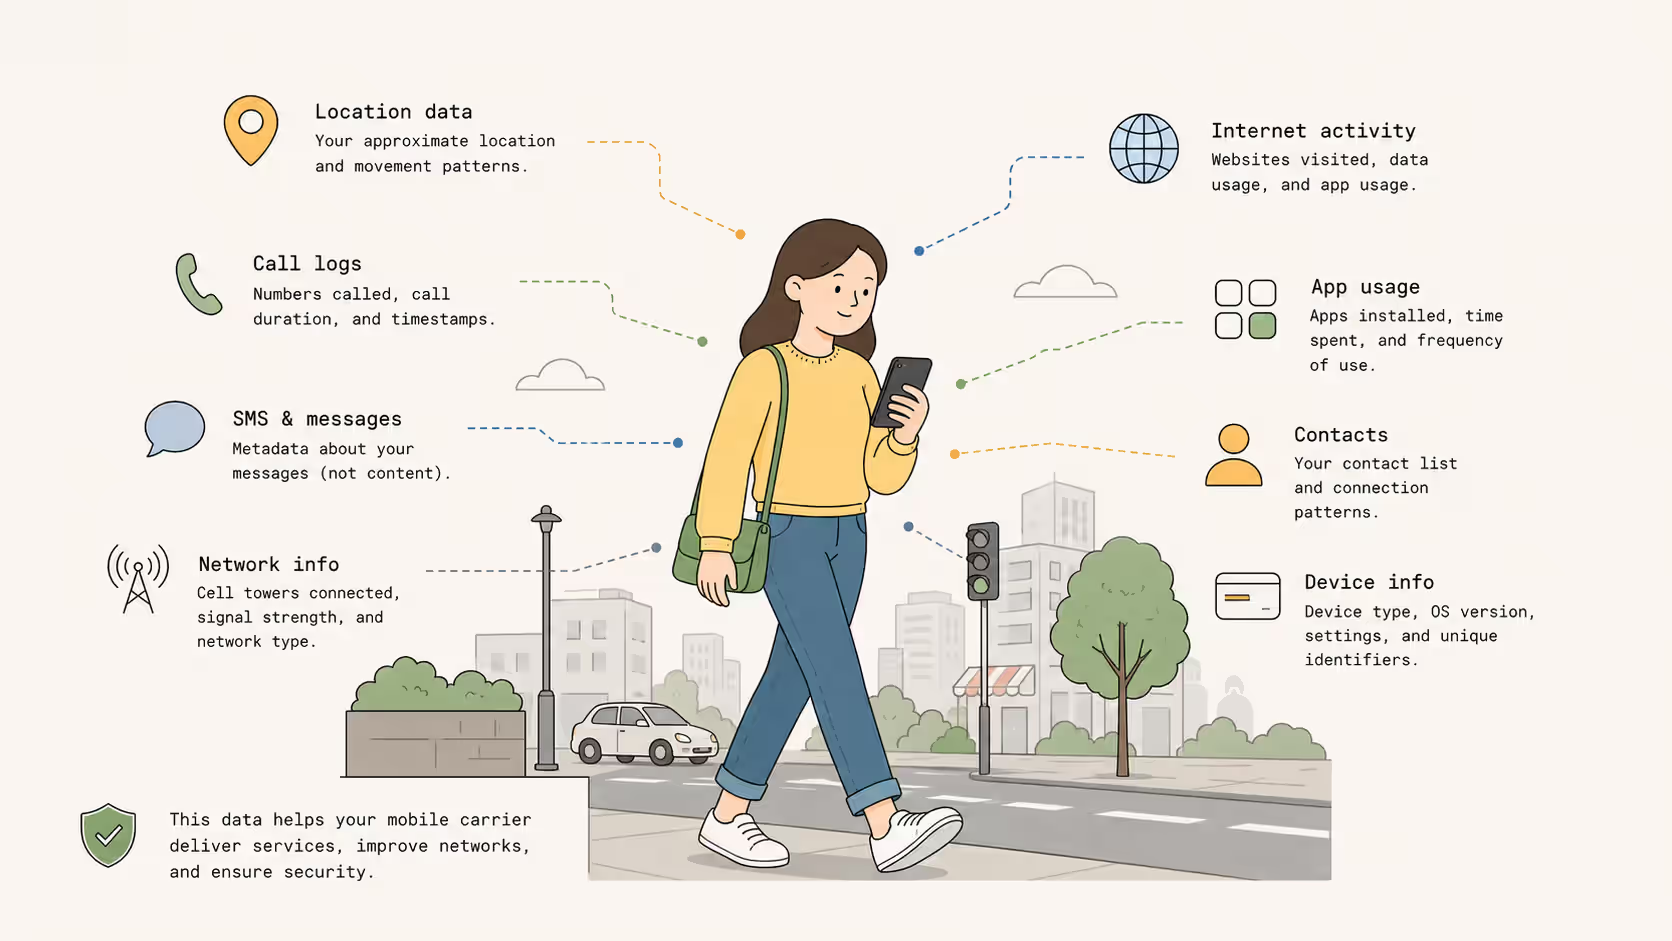
That's creepy, don't you think? Why would a company collect all of these data?
Luckily, there's a solution for this problem. By using a VPN.
A VPN cannot make every part of your digital life private, but it can help protect the connection between your device and the websites you visit or app you use. It can also hide your public IP address from the websites and services you access through the tunnel, replacing it with the IP address of the VPN provider's server.
In this guide, we will set up the Mullvad VPN mobile app, both on Android and iOS. We will create or use your Mullvad account, install the official app, connect to a server, check that the tunnel works, and review the settings that matter most for your everyday privacy.
This guide focuses on the official Mullvad VPN mobile application, so if you wanna use some other types of custom WireGuard or OpenVPN solution, sadly this is not the guide for you.
But first, let's make a quick recap of what a VPN is, and why exactly it is an interesting solution to adopt for our personal privacy.
What is a VPN?
A VPN (Virtual Private Network) is a service that creates an encrypted connection between your device and a remote server operated by the VPN provider.
Instead of sending your Internet traffic directly from your phone to every website and online service you visit, your phone sends it through this protected tunnel first, adding a layer of protection and obfuscation to the connection.
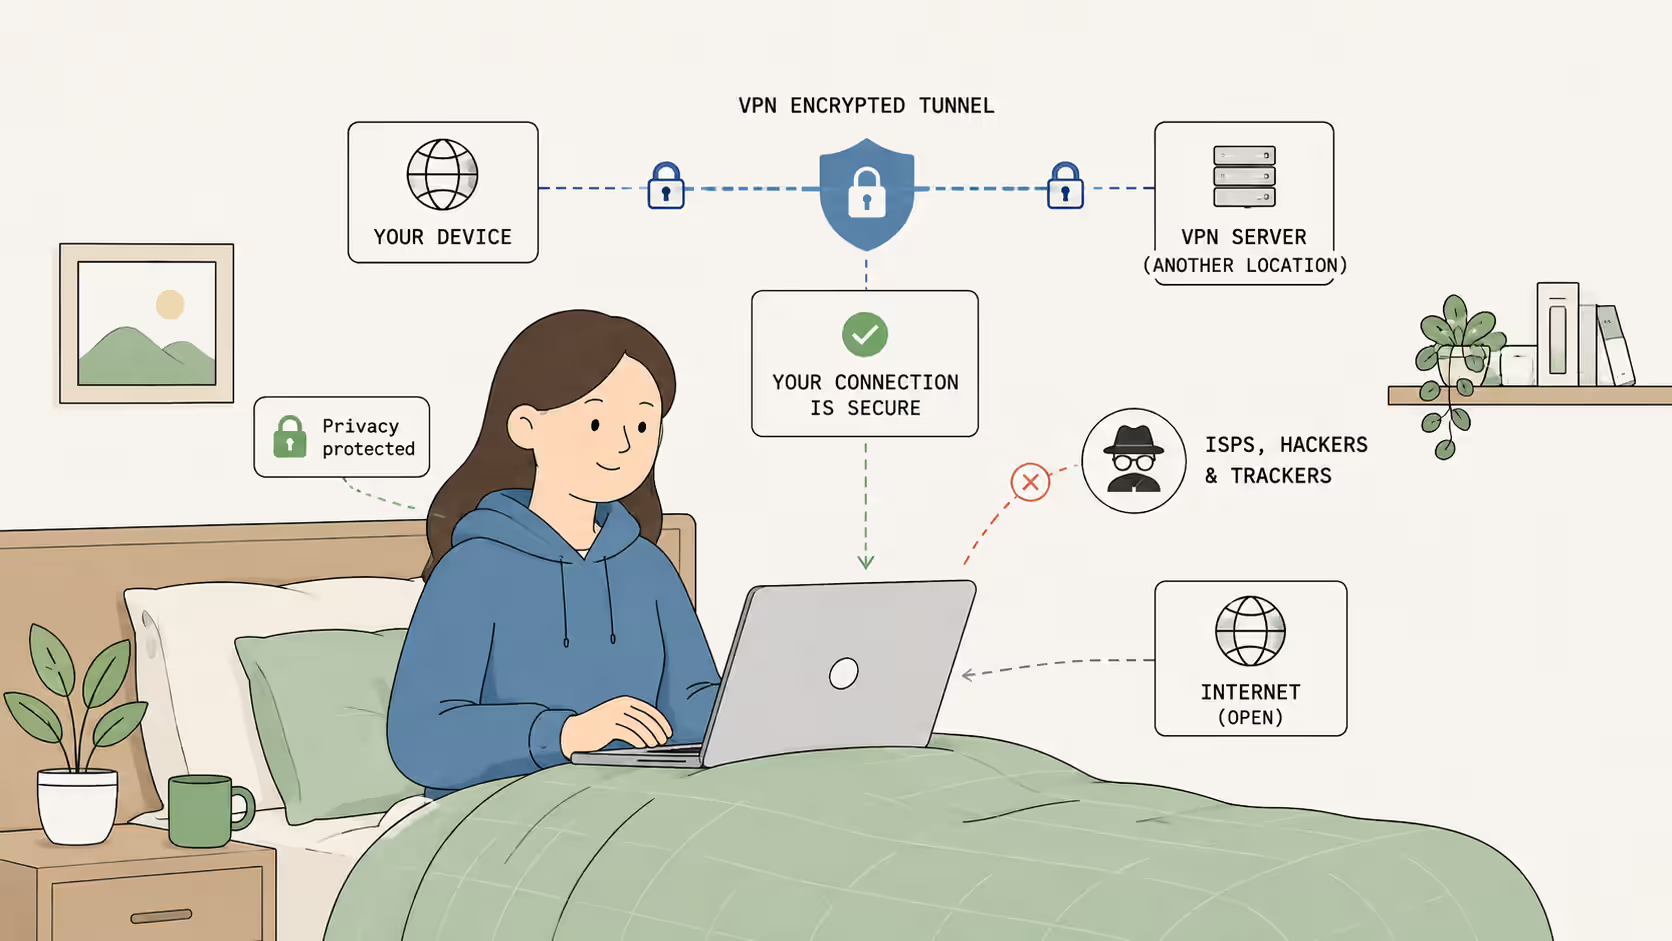
Okay, maybe this is not the easiest explanation for a non-technical person, so let's use a simpler approach.
Normally, the traffic from your device, let's say your phone, travels directly from you to the websites you're visiting.
Without a VPN
This is the direct route your traffic normally takes.
What a VPN does is add an extra step between you and the websites.
Think of it as a private route between your phone and the VPN server. Your mobile carrier or the owner of the Wi-Fi network you're on can still see that your device is connected to a VPN, but they are not able to read the contents of the traffic traveling inside the encrypted tunnel.
Once your traffic reaches the VPN server, the server sends it to the final destination on the Internet, which in this case is the website you're visiting.
This means that websites normally see the VPN server's public IP address instead of the public IP address assigned to your phone or home connection. The VPN server becomes the visible starting point of your online requests, instead of your actual router.
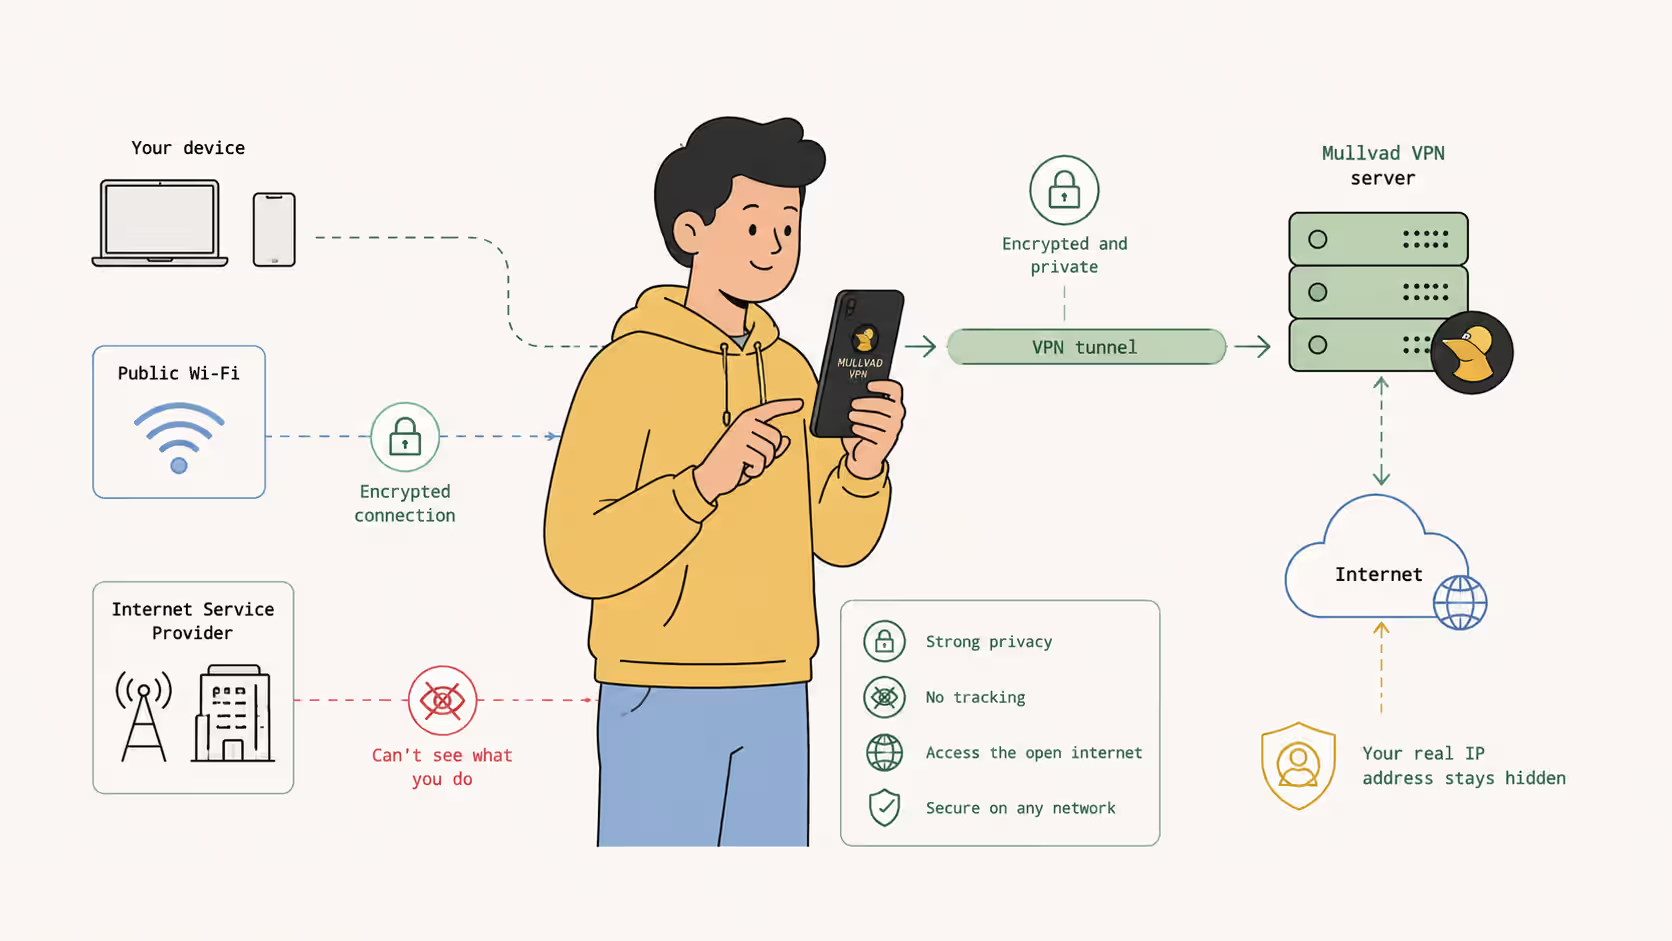
When the VPN is on, the network path looks something like this:
With Mullvad
The VPN server becomes the visible starting point of your online requests.
By looking at this diagram, you're probably thinking, "Wait a minute, my ISP can still see my network traffic!" Well, here's where the magic happens: the connection between your device and the Mullvad VPN server is encrypted!
Your ISP can see that you are connected to a VPN server, but it cannot read the contents of the traffic inside the tunnel or the specific websites you visit through it because that traffic is encrypted until it reaches Mullvad's server.
Pretty cool, don't you think?
This is especially useful when you are connected to public Wi-Fi, or when you do not want your mobile carrier to see which websites you are visiting. Come on, no one wants a company to know the complete list of websites we visit!
However, VPNs are not magic silver bullets, and there are some things they are not meant or able to do.
What a VPN does not do
When the VPN is connected, your device creates an encrypted tunnel to the VPN server. Because of this tunnel, websites normally see the VPN server's public IP address instead of the public IP address assigned to your home router or mobile carrier.
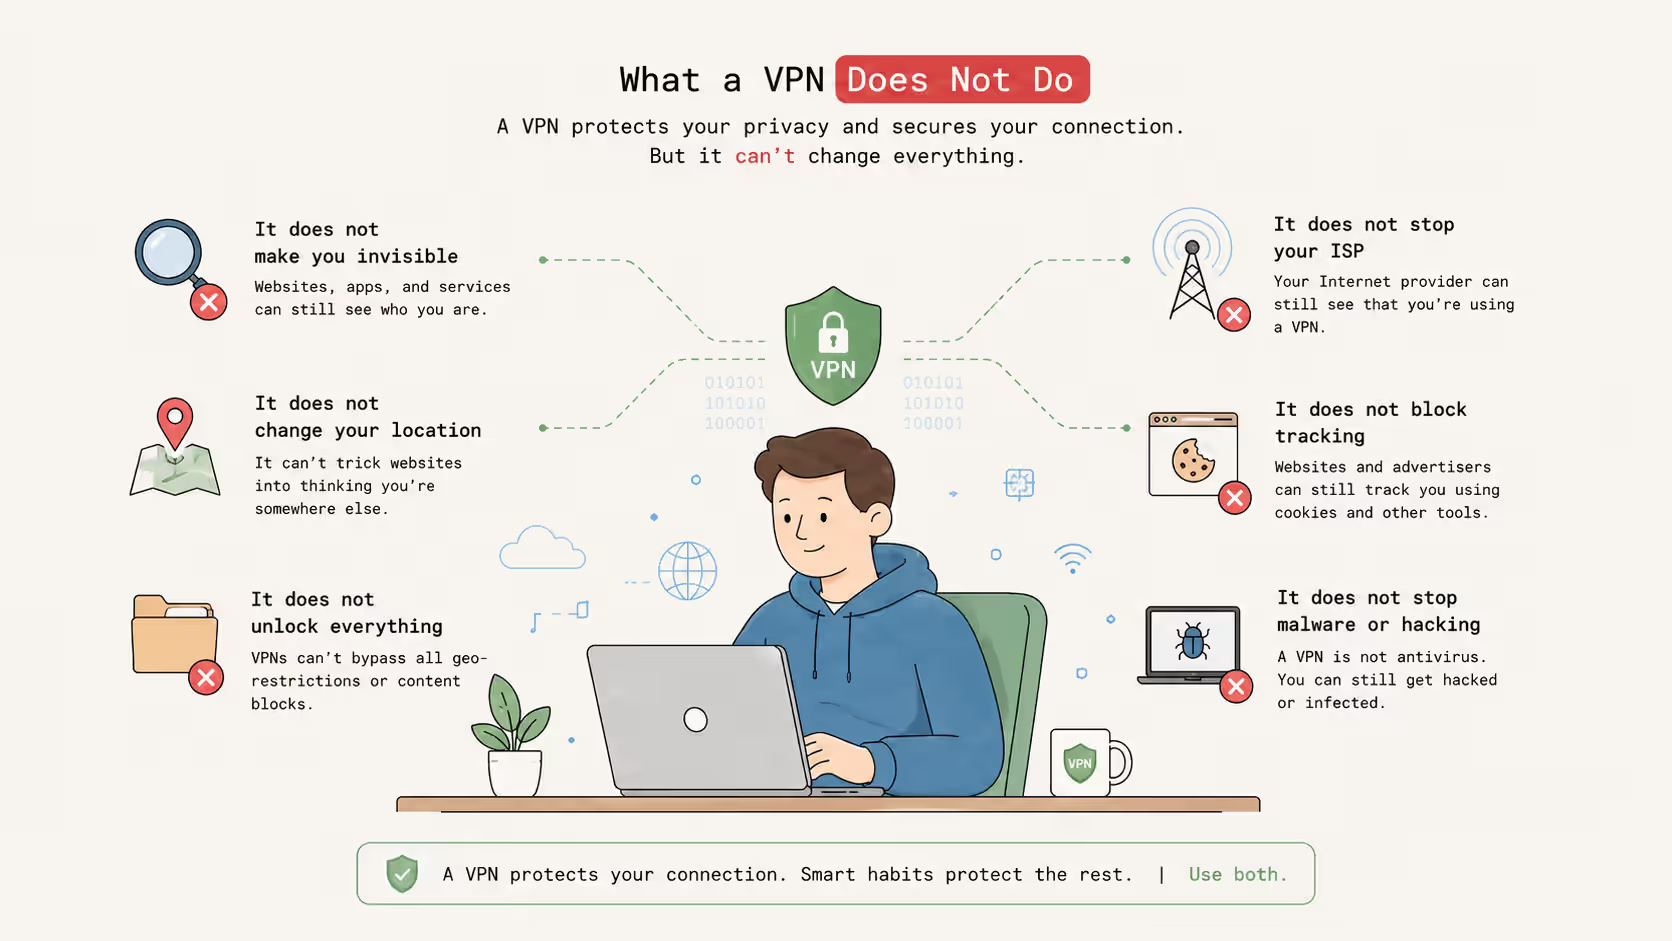
But keep in mind that this is not a complete privacy shield. VPNs do not make you anonymous, and the websites you visit can still learn a lot about you and the device you're using.
A VPN can hide your public IP address from your ISP (Internet Service Provider) and from the websites you visit, but it does not stop websites from identifying you through accounts, cookies, browser fingerprinting, or information that you voluntarily submit.
It also does not protect you from malicious apps that you install on your device, which can still collect a lot of information about everything you do. Yeah, by "malicious" apps I also mean most of the social media spyware apps.
When following this guide, you have to keep in mind that we're configuring a VPN service, an amazing one, but still a normal VPN service. It's not a magical "hide me and my traffic everywhere I go" software solution.
VPNs are also not antivirus products or a replacement for basic device security and common-sense privacy practices. A VPN is just a clever way to hide our traffic, or at least the contents of it and the websites we visit, from our ISP and mobile carrier.
A VPN does not prevent our Internet Service Provider from seeing our browsing patterns throughout the day and, most importantly, does not prevent authorities from triangulating your precise location using mobile phone towers.
So, to conclude, a VPN can:
- Encrypt the connection between your device and the VPN server.
- Hide your public IP address and the websites you visit from your mobile carrier.
But it cannot:
- Make you completely anonymous.
- Stop websites from identifying you through accounts, cookies, or browser fingerprinting.
- Prevent your mobile carrier from seeing your browsing patterns.
- Prevent authorities from determining your location through mobile phone towers.
If this is not what you're looking for and you want a more secure way to browse the web, sadly, a VPN is not the magic wand you were probably hoping for. It's definitely an important piece of the puzzle, but it is not the whole solution.
If you're OK with its limitations and tradeoffs, let's continue with the guide!
Why Mullvad
Ok, but why exactly Mullvad? It's not a mainstream VPN provider, and you've probably never heard of it. So, why exactly this weird provider?
Mullvad is probably one of the most secure and privacy-friendly VPN providers on the market. Privacy is the number one priority for the Mullvad team, followed closely by security and safety.
Mullvad is so private that you don't even need an email address to use it! When you subscribe, they assign you a random numerical account number, and that's all you need to use the product. Not even a password!
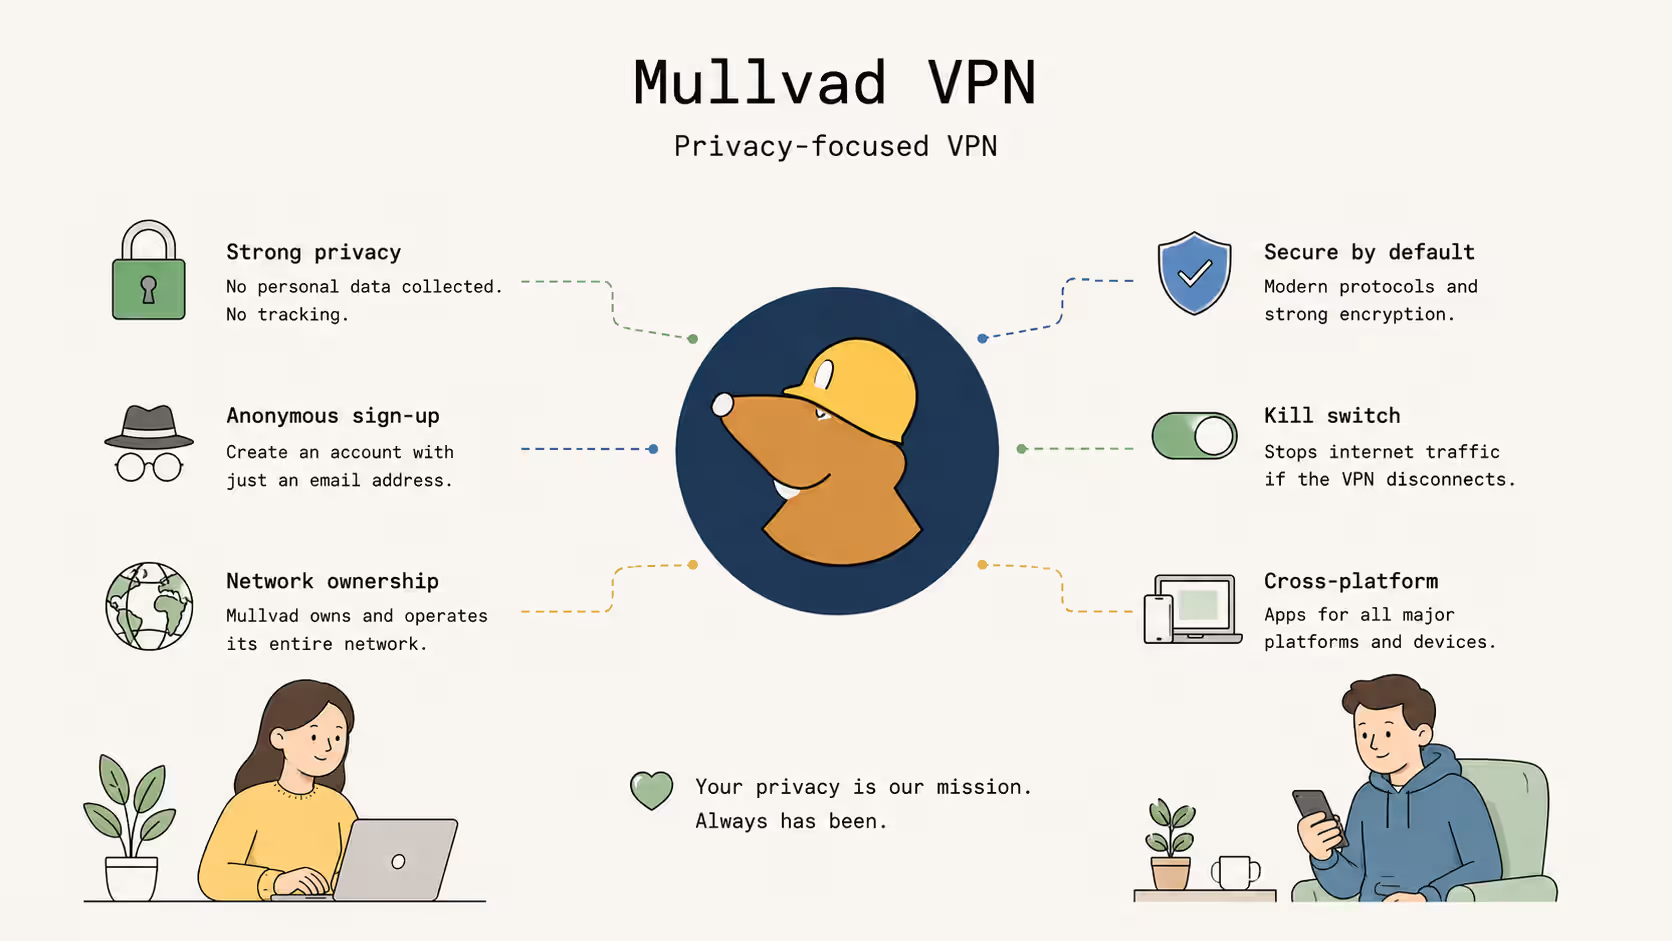
Mullvad also has a strict no-logging policy, which means that they do not save the history of their users' traffic, DNS requests, connection timestamps, IP addresses, or bandwidth usage.
This is an amazing policy to have, and if your goal is to keep your Internet traffic away from your ISP and avoid creating another detailed record of your online activity, this is definitely one of the best options.
In this guide, we will use Mullvad exactly for this reason, and because I truly admire their devotion to free speech and an open Internet, I think they're a great provider for this kind of application!
What We Need
Before starting, we need to make sure we have the following components:
- An Android phone running Android 9 or newer, or a supported iPhone or iPad.
- A working Wi-Fi or mobile-data connection for the initial download and login.
- A Mullvad account number with available usage.
- Access to the official app store or an official Mullvad download source.
- A few minutes to test the connection on both Wi-Fi and mobile data.
If you are following this guide while you're connected to an untrusted public Wi-Fi network, avoid entering sensitive information until you have confirmed that you are using the genuine Mullvad app and website.
1. Create or locate your Mullvad account
If you don't currently have an account with Mullvad, we need to create one. To do that, open the official Mullvad account page in a browser you trust.
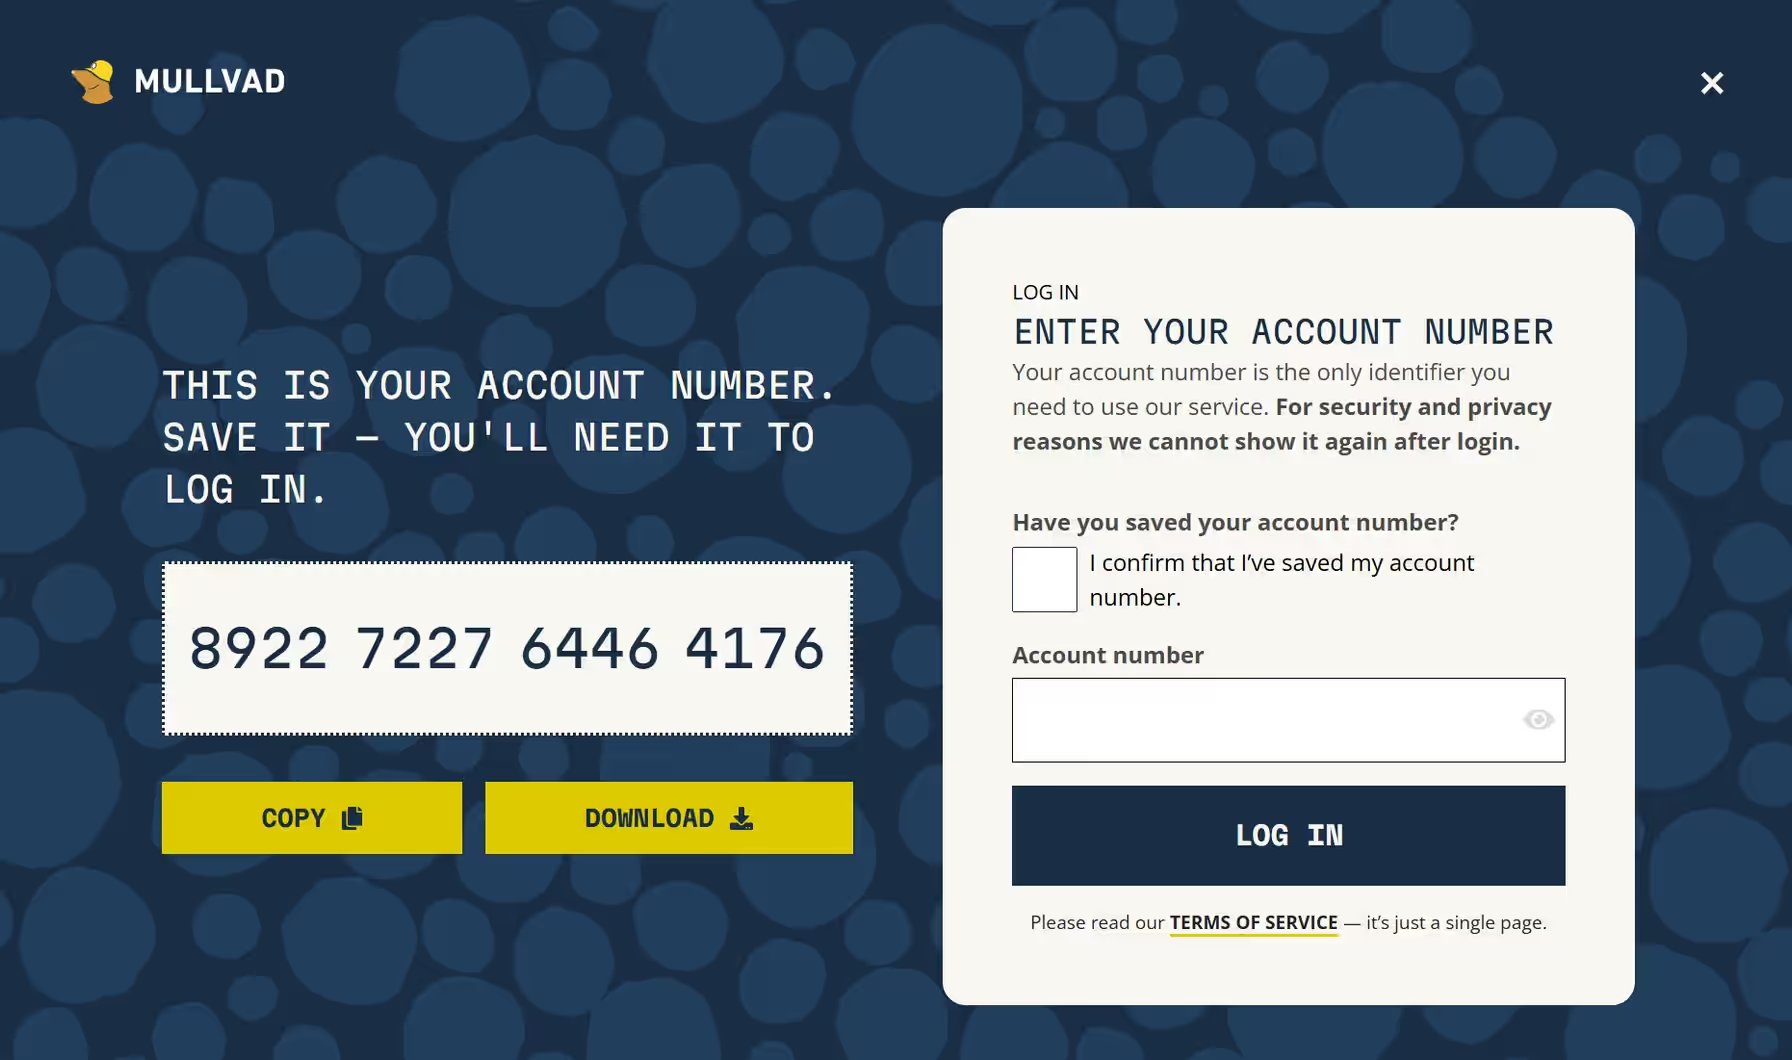
The amazing thing with Mullvad is that you can create an account without providing an email address. Instead, it generates a new personal random account number for every user, making it the only way Mullvad have to tell who is who.
I would suggest you save the account number in a password manager like BitWarden or Proton Pass. And most importantly never share it with anyone! So not post it in screenshots, support forums, chat messages, or issue reports. Anyone who has the number is able to use the account while it has time remaining!
If you already use Mullvad and already have an unique account number, make sure to have some available time on it.
Add account time
Mullvad uses a prepaid account time system instead of a traditional monthly subscription. When you add time, you purchase a specific period of VPN access and add it to your account. That time then counts down as the account's expiration date approaches, whether or not you are connected to the VPN or using their service.
To add time, sign in to the Mullvad website with your account number and choose one of the available payment methods. The options may vary by region, and can also change over time.
One very interesting option I've never seen anywhere else is cash. Yeah, actual cash! Mullvad gives you the option to send banknotes by post along with your account number. Once Mullvad receives the payment, the time is added to your account.
This is a great option if you want to pay for the service without linking your account to an online payment method!
2. Install the Mullvad mobile app
Okay, we can now finally download and install the app on your phone. The safest choice is usually the official app store for your operating system: Google Play for Android and the App Store for iOS.
Android
On Android, open the Mullvad VPN page in Google Play, tap Install, and then tap Open when the download finishes.
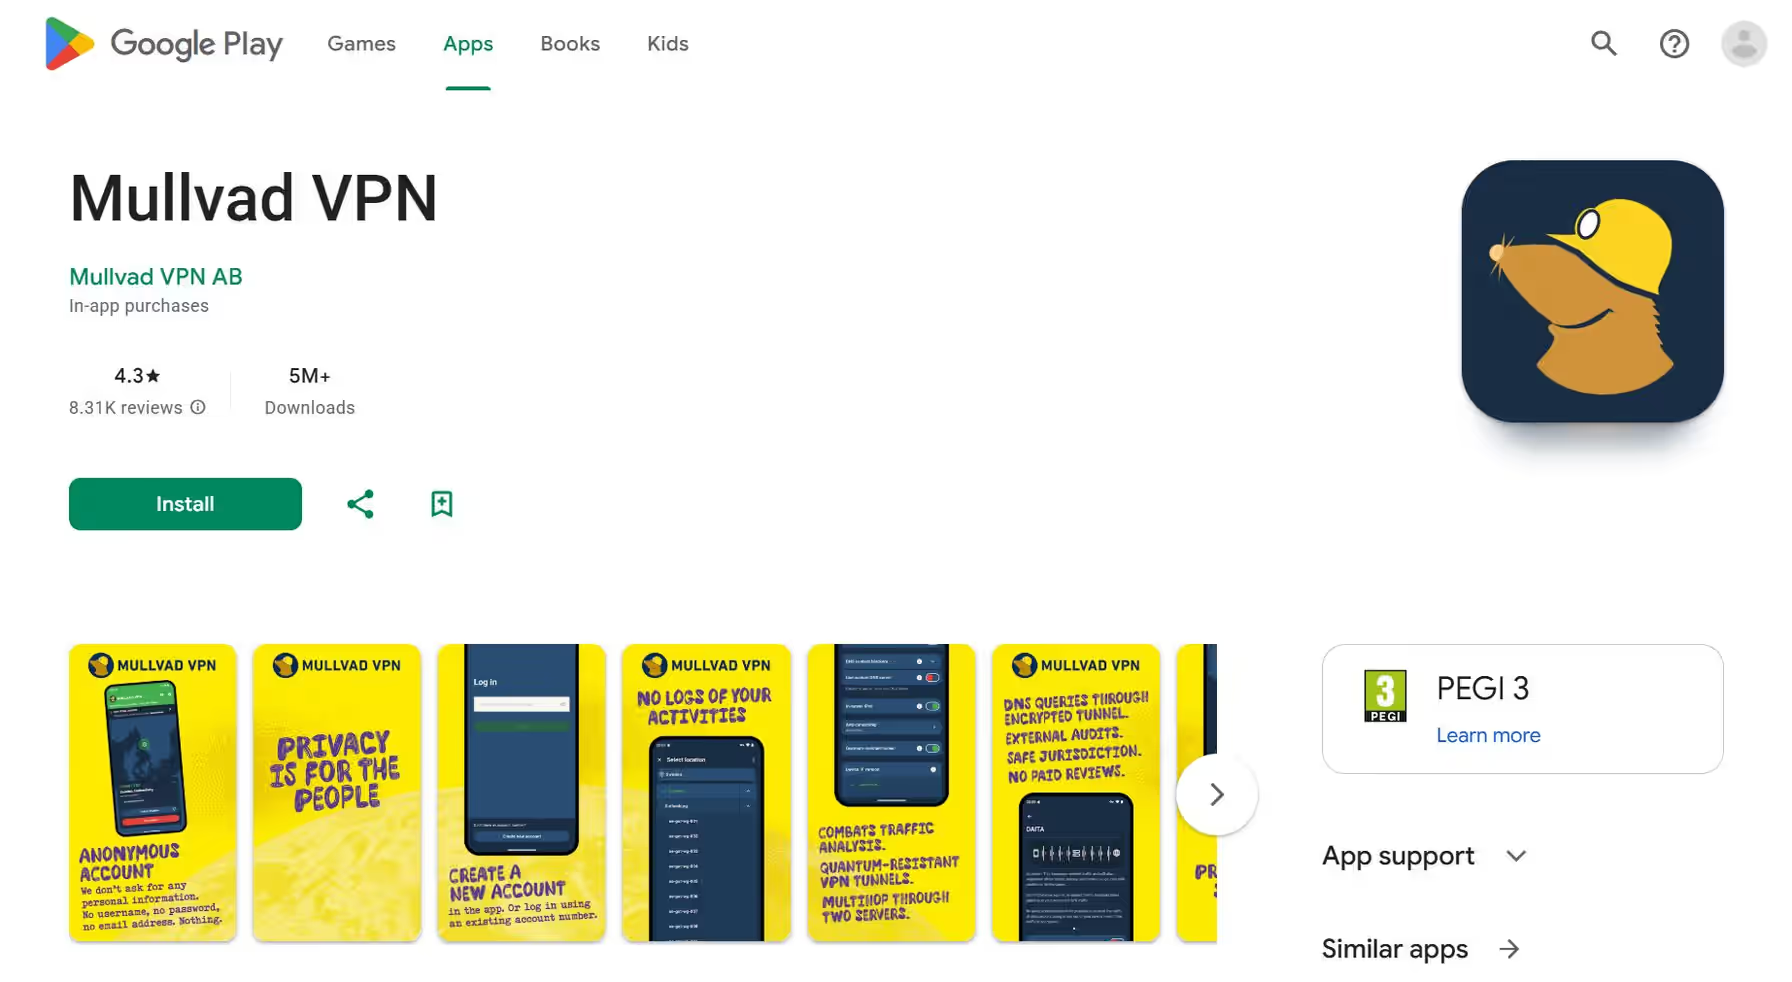
Mullvad also documents alternative Android installation methods, including downloading the APK from its website, F-Droid, and Obtainium. If you use an APK, verify that you obtained it from an official Mullvad source and understand the security implications of allowing installations from outside Google Play.
Mullvad's current Android requirements state that the device must run Android 9 or newer. Older devices may not be able to install or use the current app version.
iPhone and iPad
On iOS and iPadOS, open the Mullvad download page, follow the link to the App Store, and install the official Mullvad VPN app.
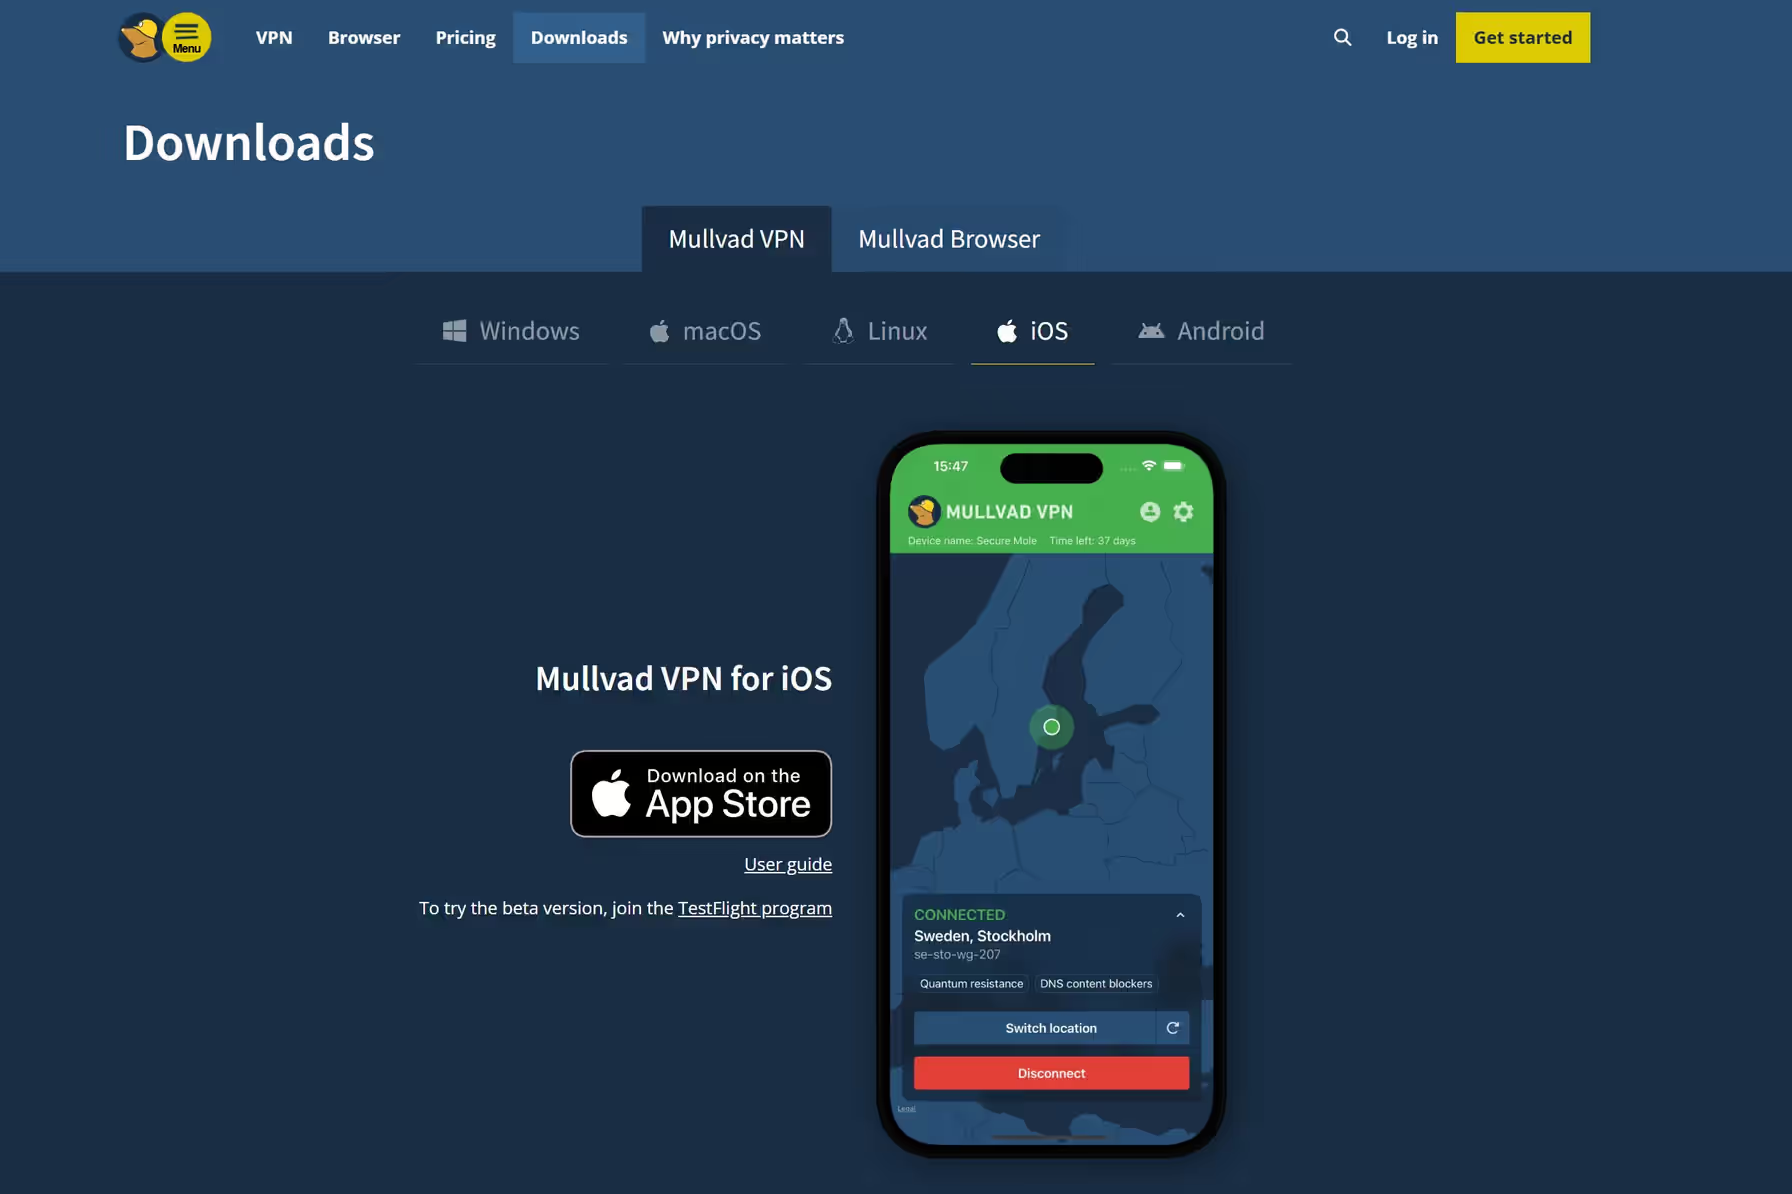
Make sure to avoid similarly named apps that are not published by Mullvad VPN AB. Check the developer name, app description, and download link before installing the app.
Keep the installation source consistent
On Android, updates generally need to come from the same source used for the initial installation. For example, an app installed from Google Play should normally be updated through Google Play. If you switch sources, you may need to uninstall the existing app first, which may remove some local settings and configurations.
3. Open the app and log in
Once the download and installation steps are complete, we can launch the Mullvad VPN app. The first screen you see should offer an option to log in or enter a Mullvad account number.
Enter your Mullvad account number carefully and submit it. As we mentioned before, Mullvad does not use a traditional email and password combination, you only need to enter a single account number. If the app reports that the account is invalid, check for missing digits, extra spaces, or a number copied from a different account.
After signing in, we can review the account information shown by the app to make sure it matches what we expect. Make sure that the account has remaining time before troubleshooting network settings, because an expired account can look like a connection problem even when the installation is working correctly.
The app will probably ask you for permission to create a VPN configuration on your device. Approve this system prompt so the app can establish the VPN tunnel needed to actually use the VPN service. iOS and Android manage this permission through their own operating-system dialogs, so the wording may vary slightly between the two operating systems.
4. Connect to Mullvad
Now that the app is installed, the account is signed in, and the operating system has granted Mullvad permission to create its VPN configuration, we can finally connect to the service. The main screen has a large connection control and should indicate that the VPN is currently not connected.
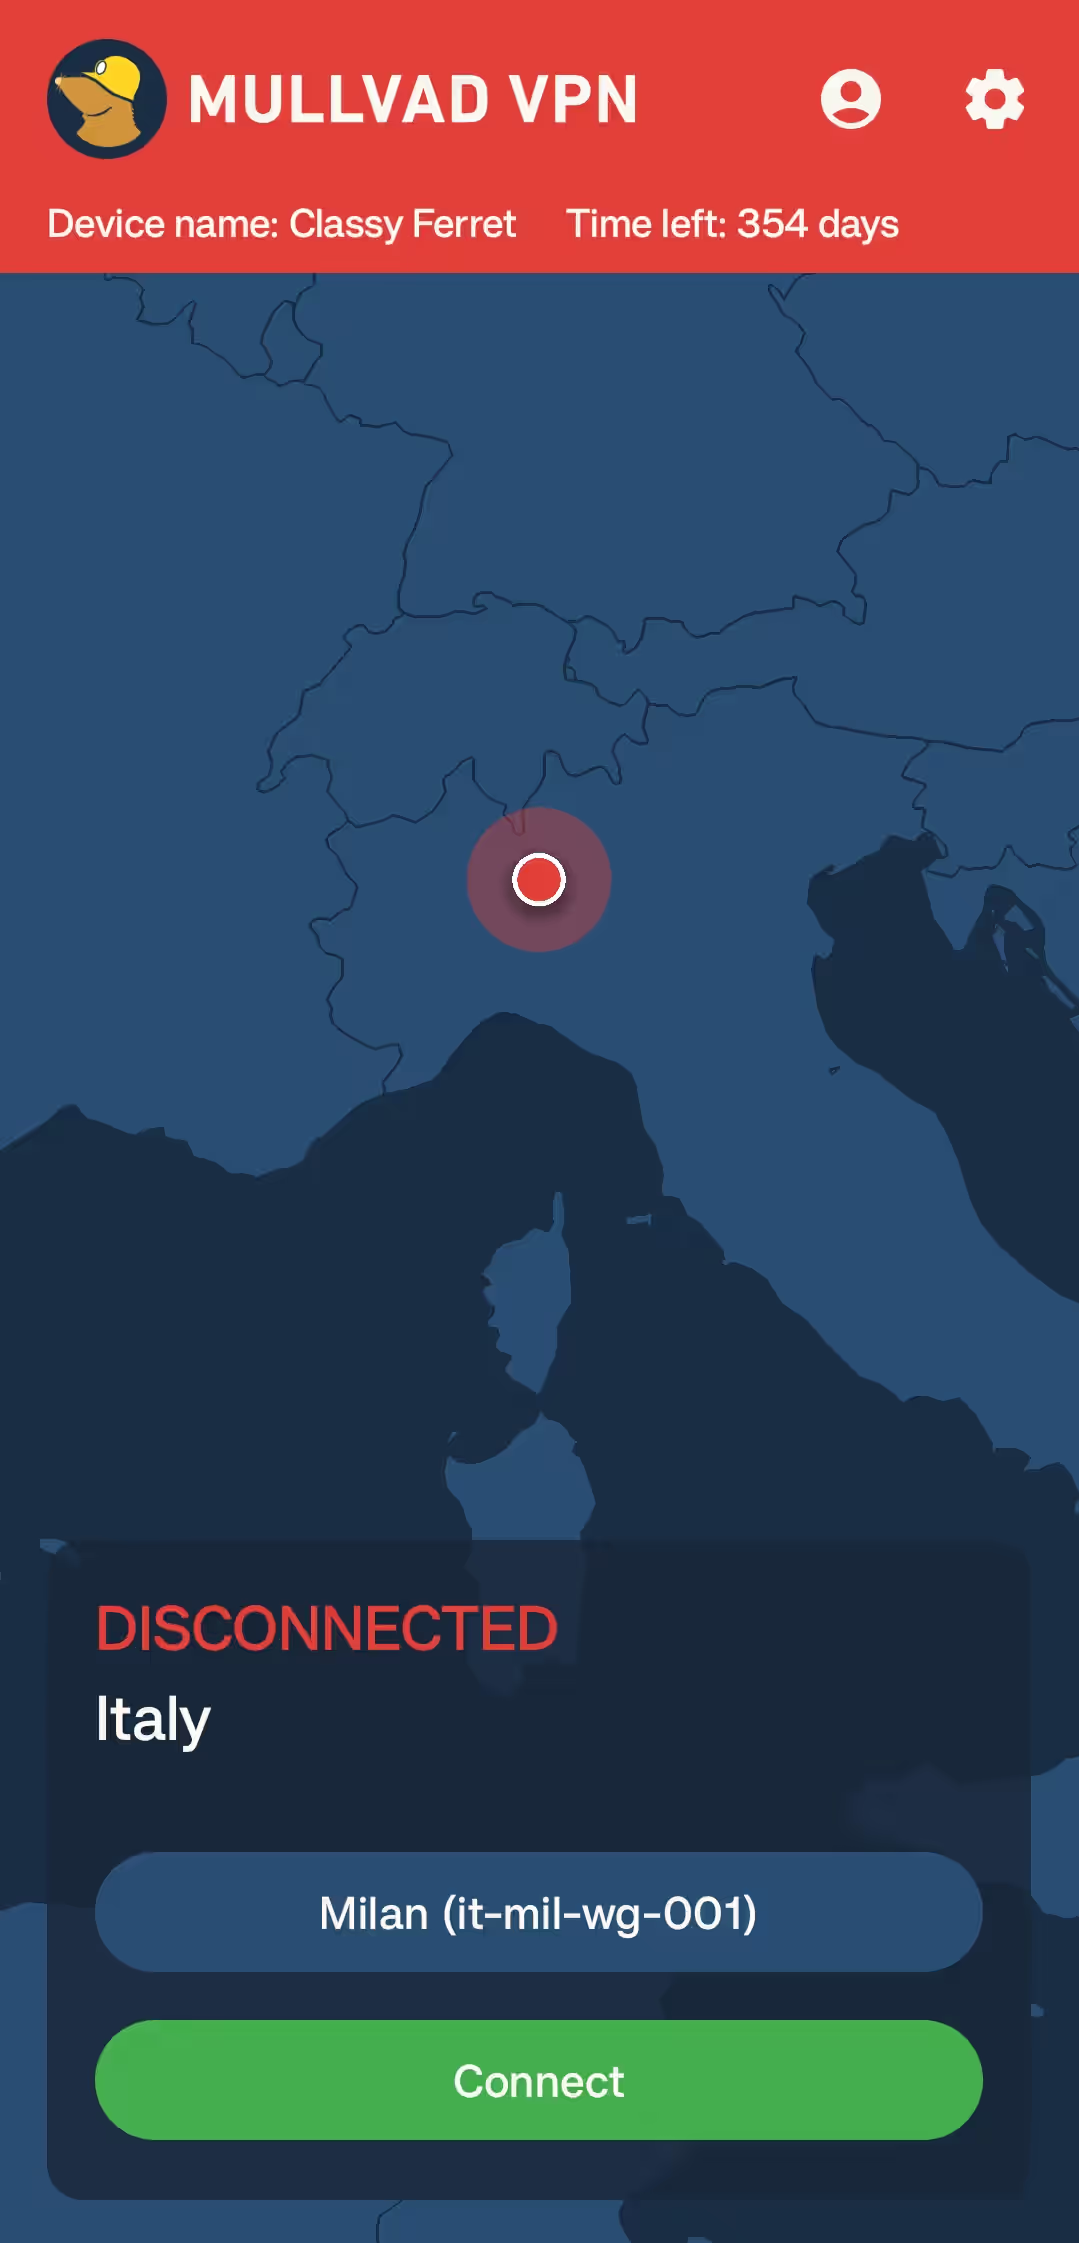
To enable it, simply tap the main button and give the app a moment to establish the VPN tunnel with the selected Mullvad server.
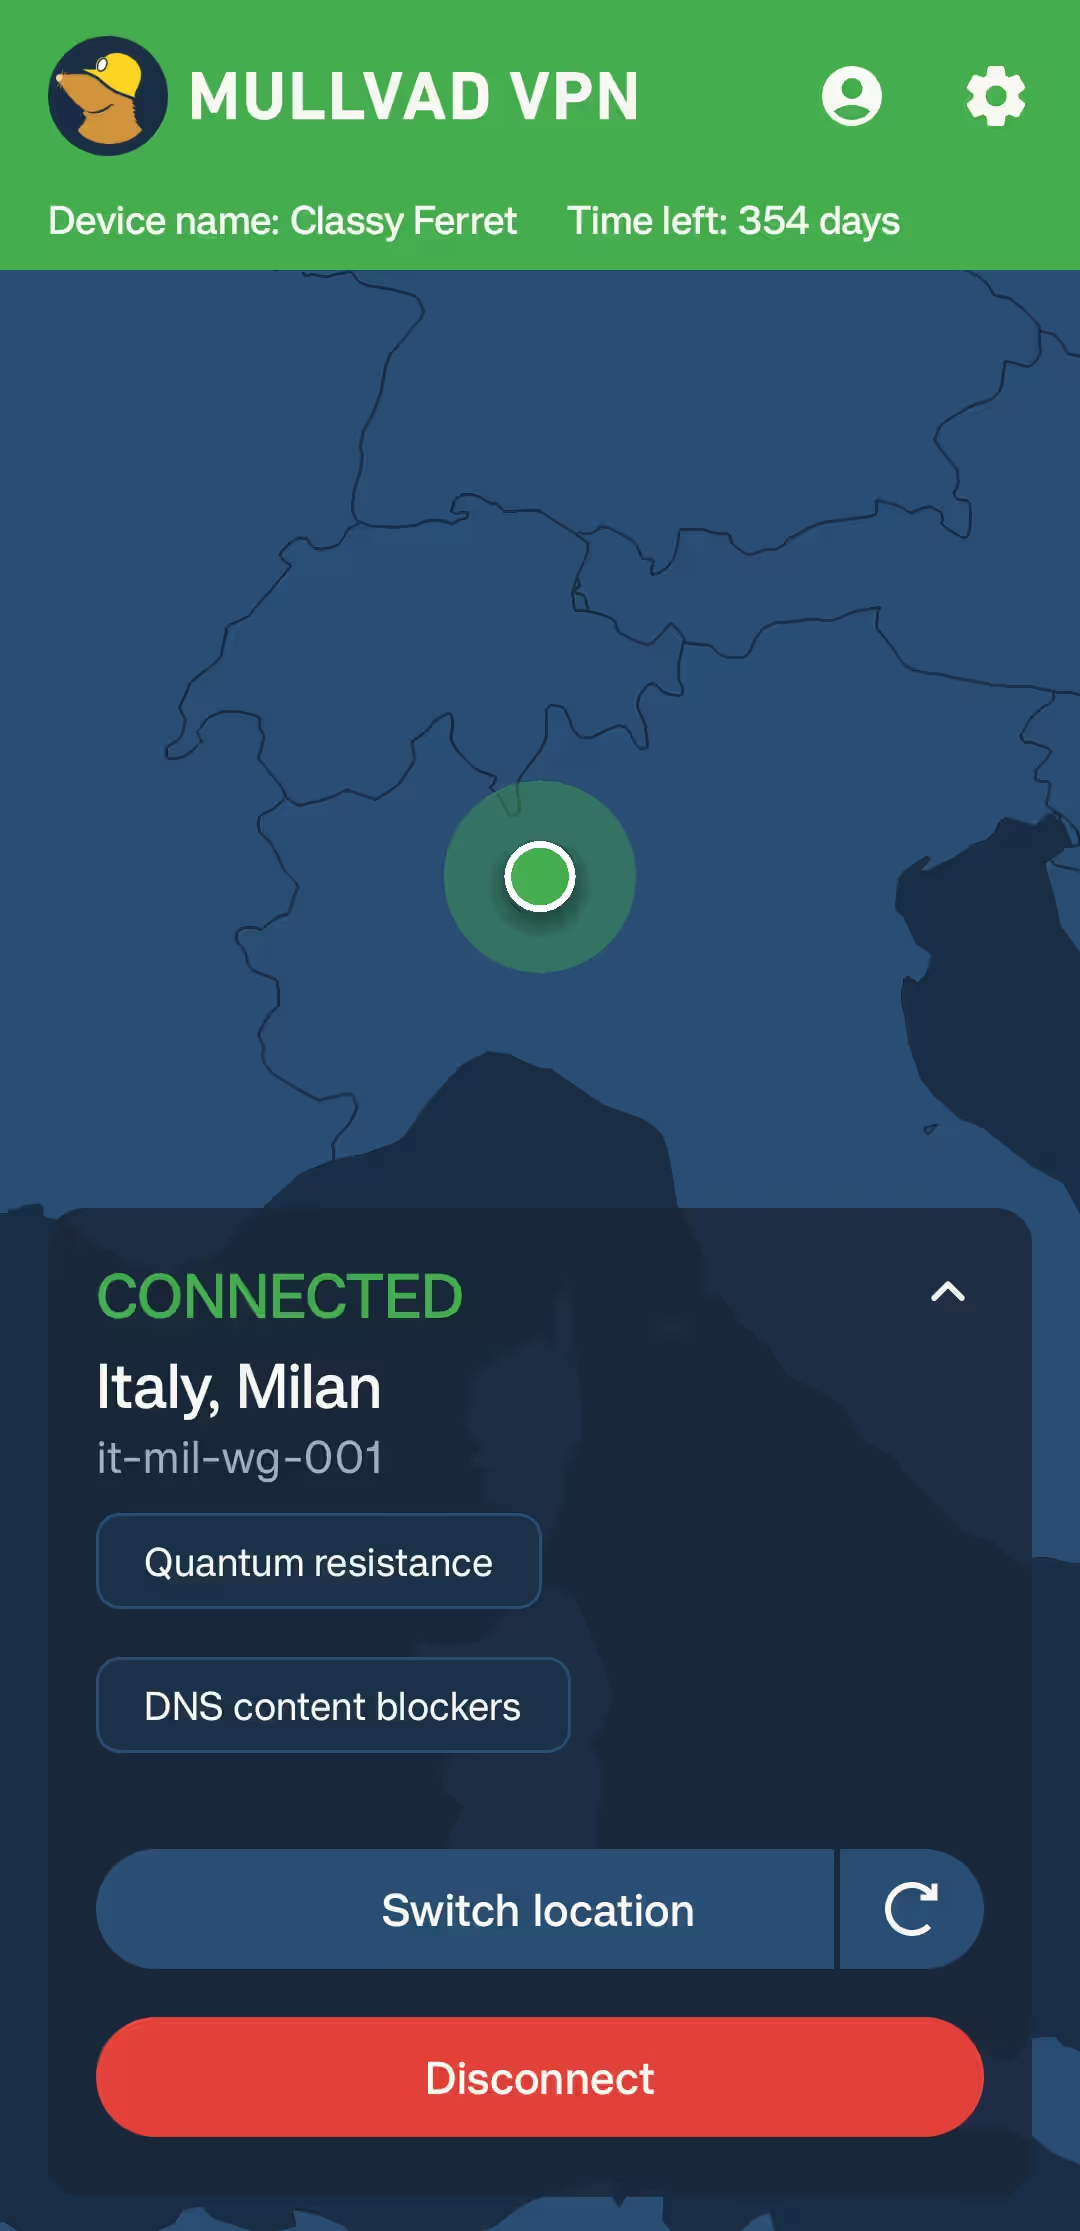
The first connection may take a little longer than the ones that follow, as the app still has to finish setting up the device VPN profile and negotiate a connection with the server. Once everything is ready, Mullvad should show a clearly connected state, while Android or iOS may also display a VPN indicator in the system interface.
It is important not to confuse having the app open with actually being connected and protected by the VPN. Before using an untrusted network for anything sensitive, check the connection state inside Mullvad and, when available, look for the VPN indicator provided by your operating system as well.
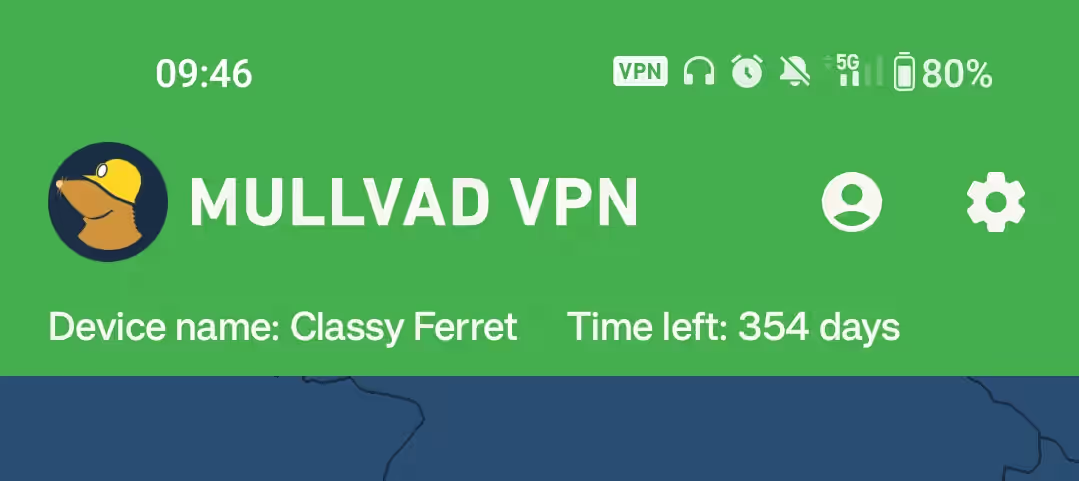
When you want to disconnect, return to the Mullvad app and tap the same connection control again. This can be useful when a local service, captive portal, or other network resource does not work properly through the VPN.
However, you have to keep in mind that disconnecting sends your traffic back through the ordinary Wi-Fi or mobile-data connection, so reconnect right away when you are finished with whatever required the change.
Test the public IP address
The easiest way to confirm that the tunnel is doing what we expect is to open the Mullvad connection check page while the app is connected. The page should identify a Mullvad server location and display a public IP address that differs from the one your connection uses when Mullvad is turned off.
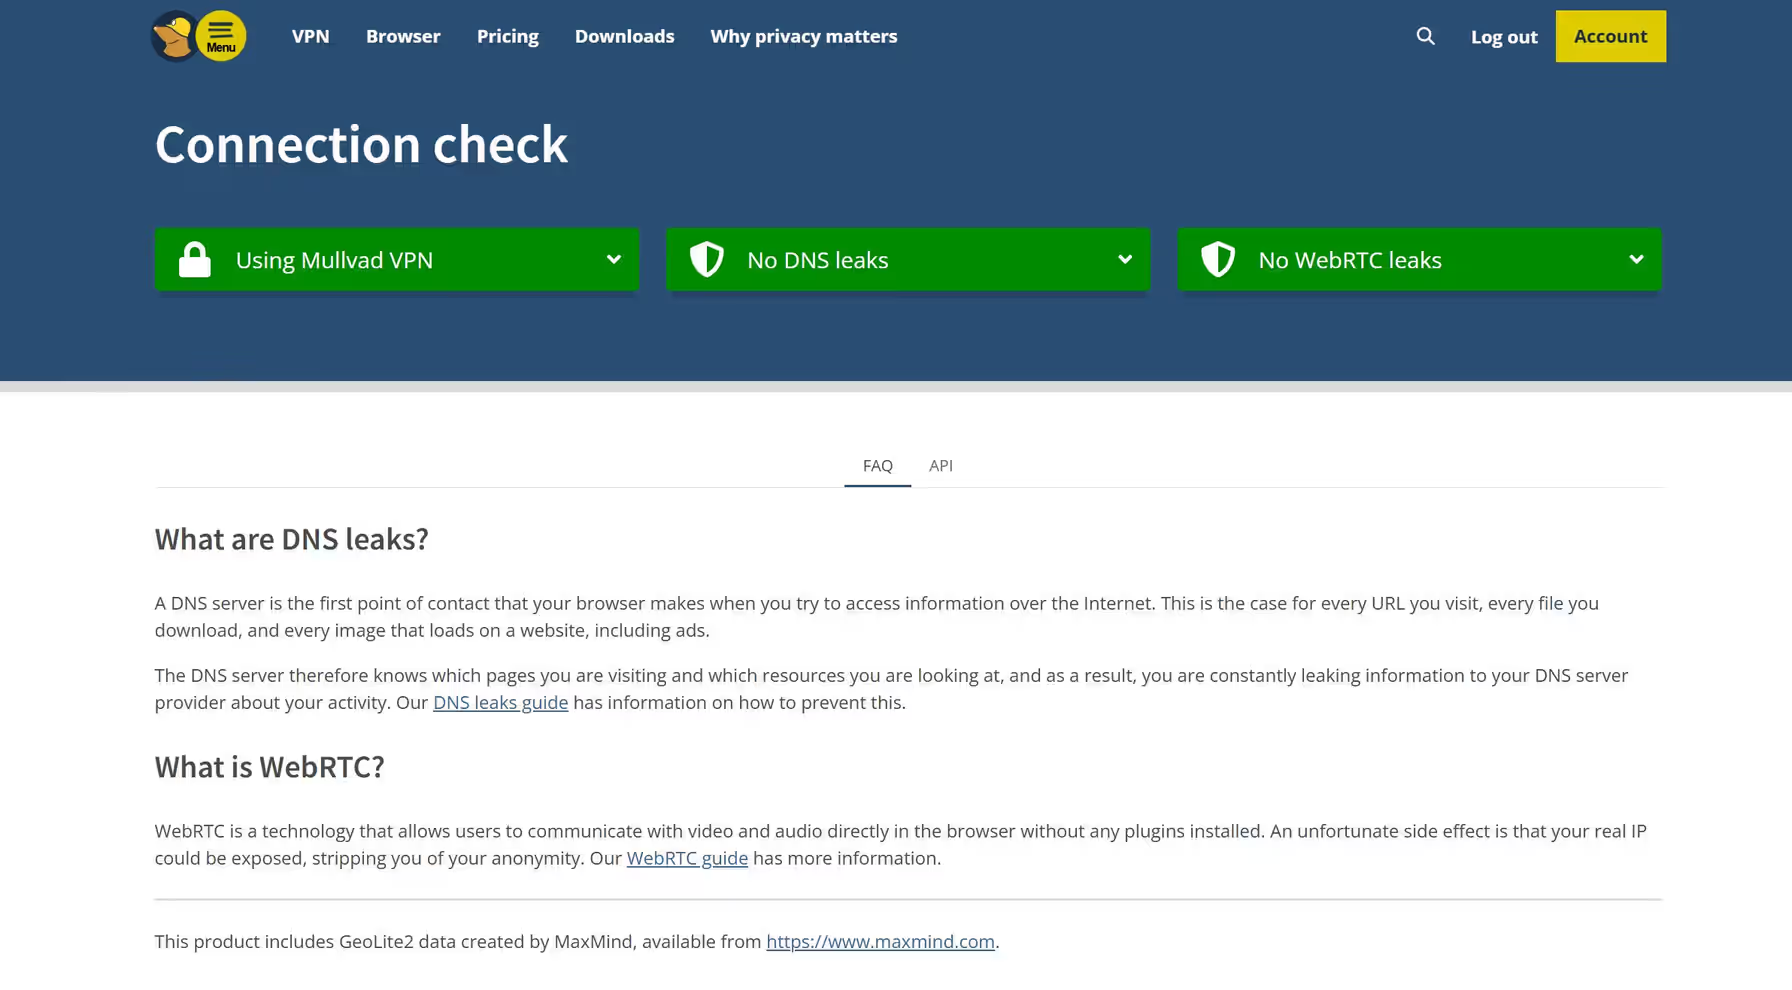
For a clearer comparison, run the check once while connected, and once again after disconnecting, paying attention to both the reported location and public IP address. If you need to share a screenshot while asking for help, make sure it does not reveal your account number or other private device information!
5. Choose a server and location
The default location is a perfectly good place to start, especially if you are still learning how the app works. When changing the location, Mullvad lets you choose a particular country, city, or even an individual server. Before changing anything, just open the location selector and take a look through the available options so you have a clearer idea of what you can choose.
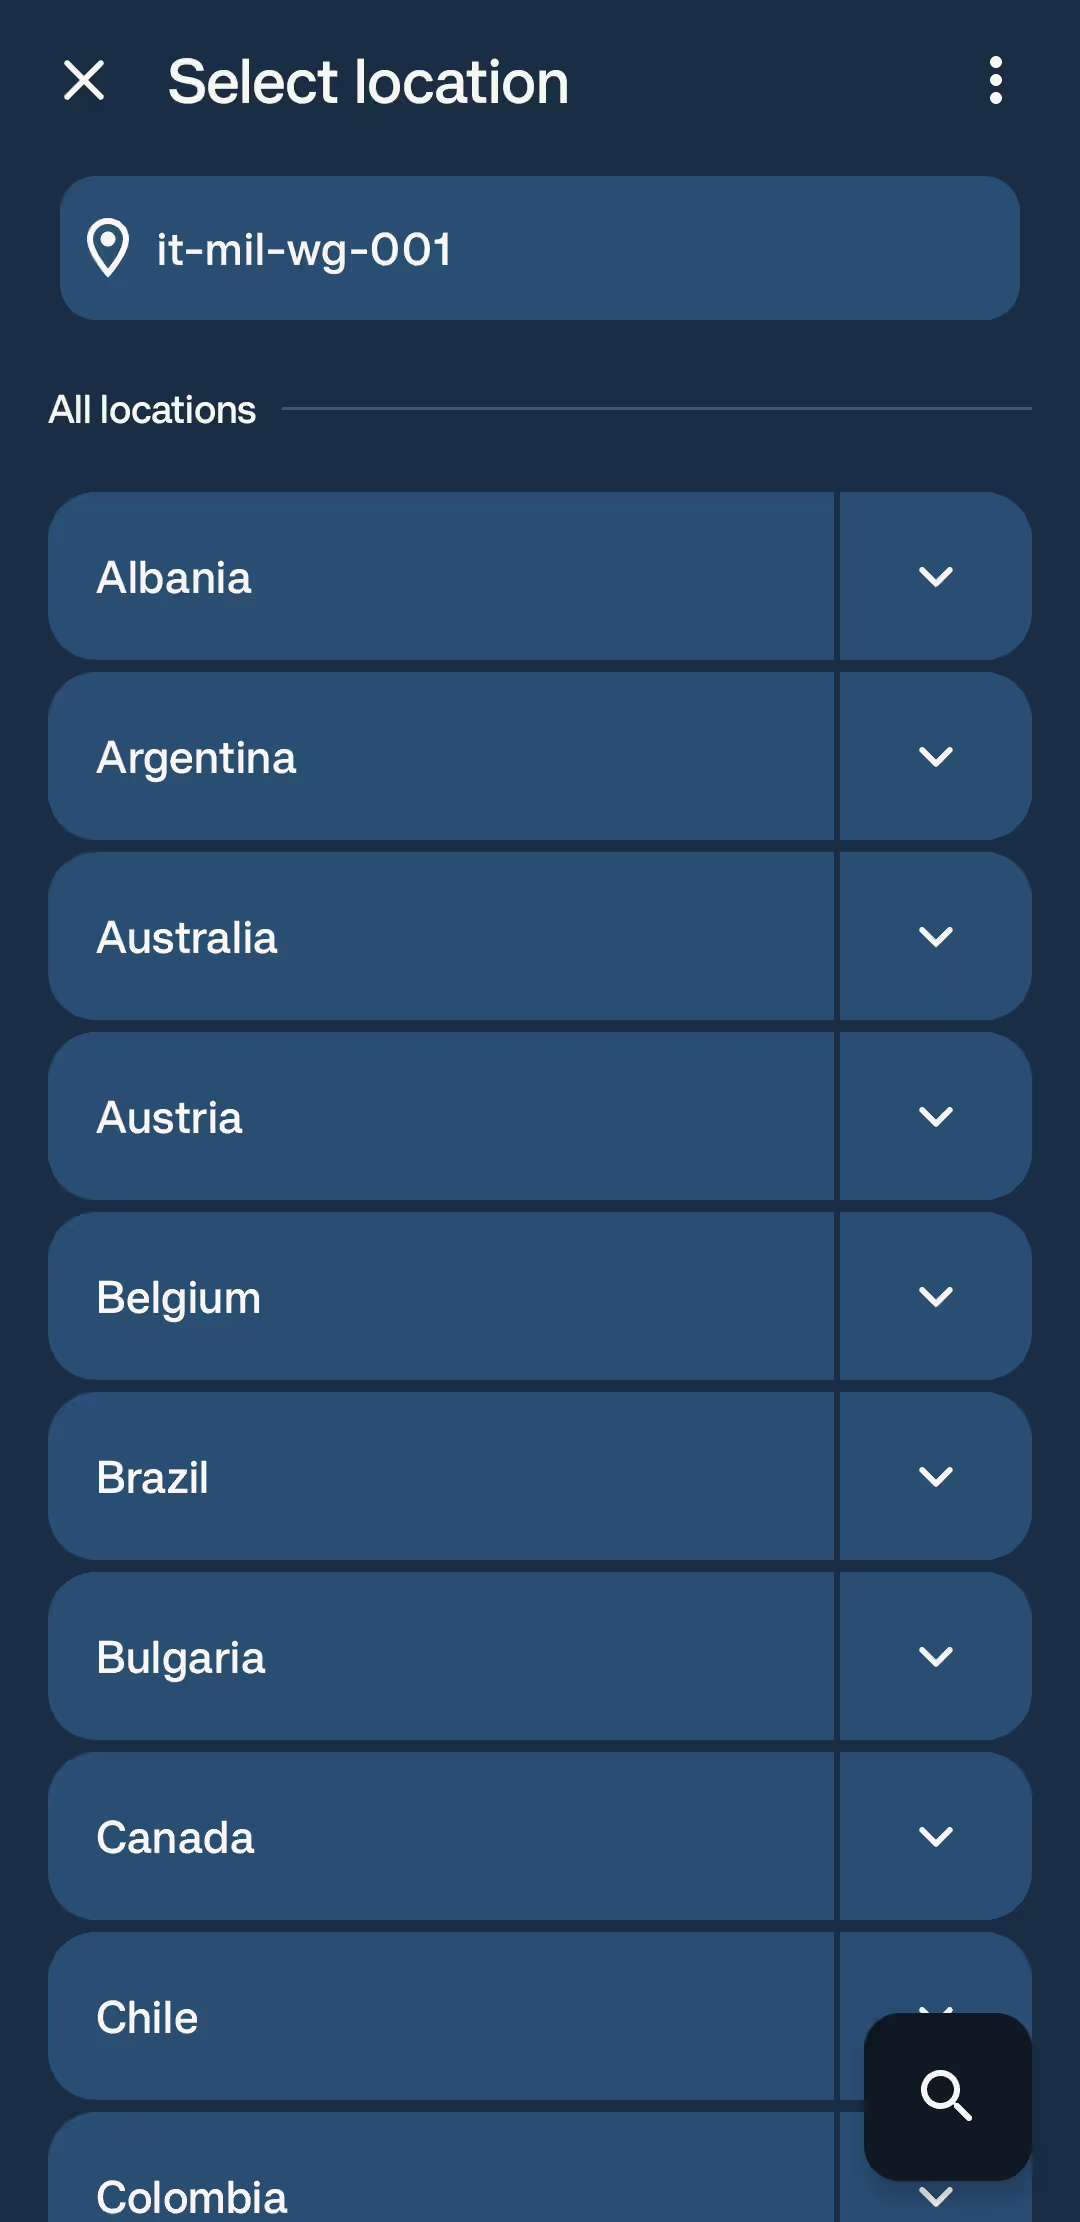
If your priority is lower latency, a nearby country will usually be the sensible first choice. If you need websites to see a different exit location from your current position, choose the country that serves that purpose instead. The same reasoning applies when choosing a city.
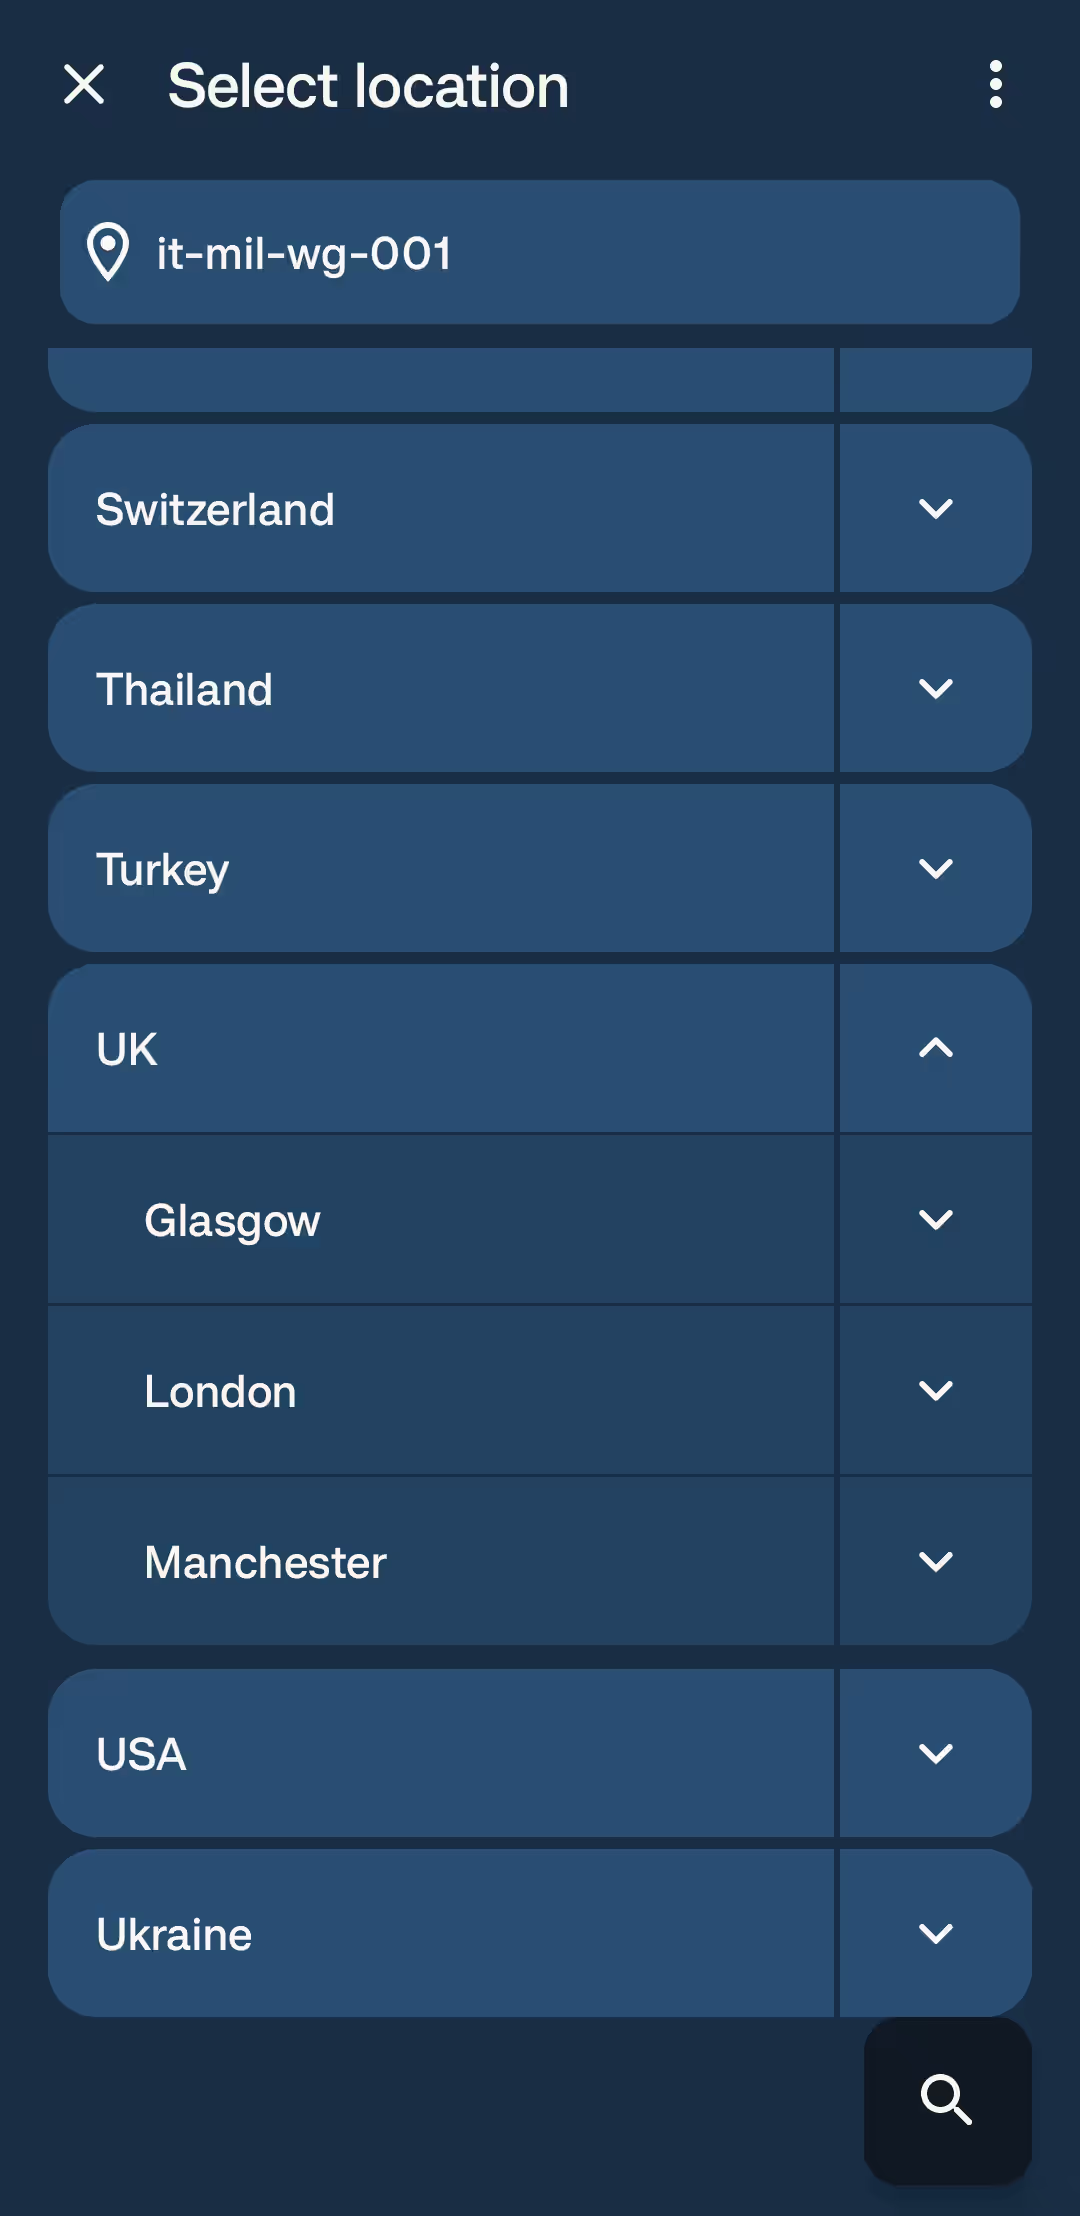
There is no universally best server, because the result strongly depends on your physical location, current server load, mobile carrier, network conditions, and the service you are trying to reach.
When a location offers several servers, you can compare their speeds if performance is what really matters to you. A lower load is not a guarantee that a server will be faster, since distance and network routing also play a role, but it is still a useful signal when you are choosing between otherwise similar options.
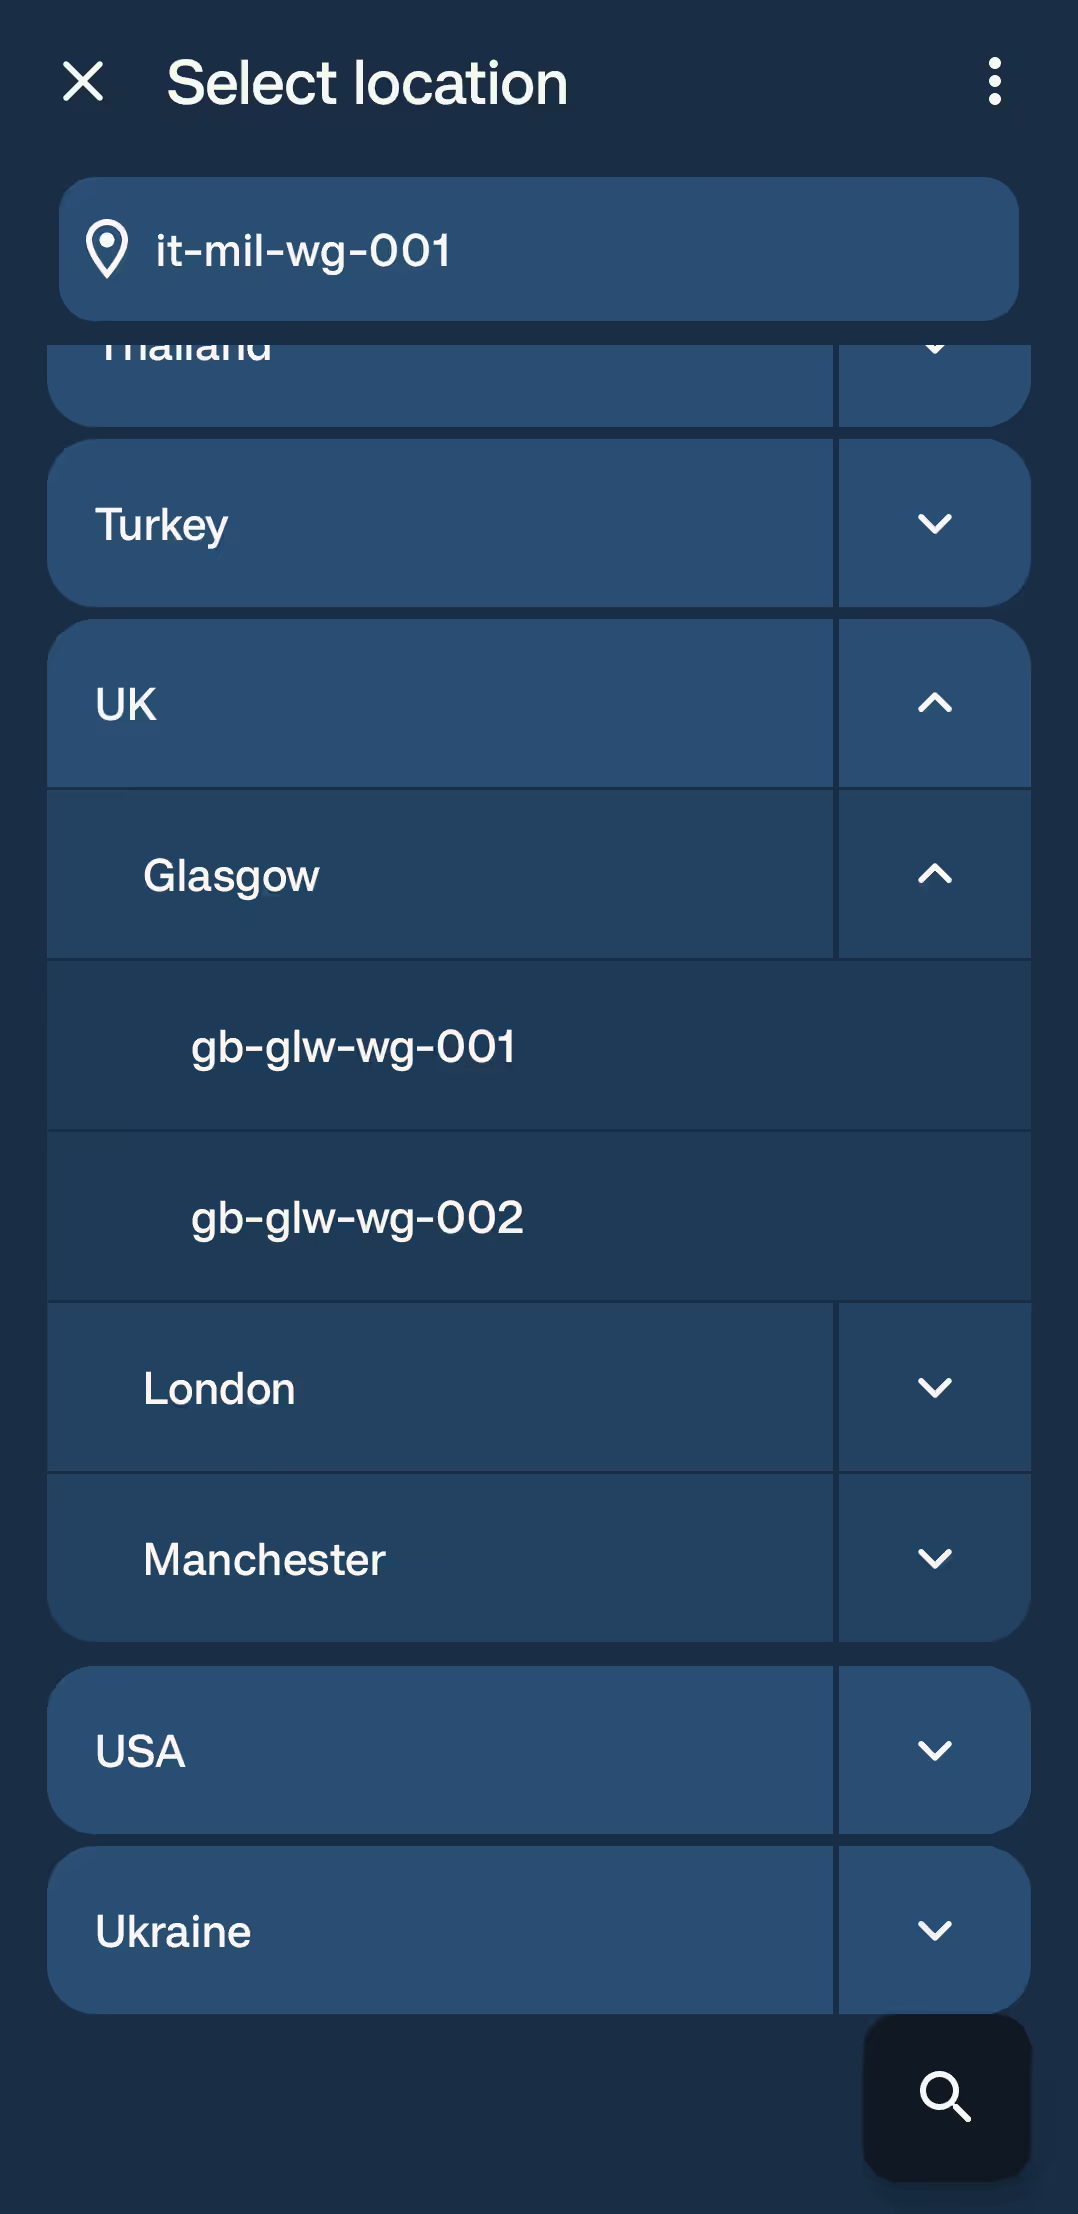
After selecting a new location, connect again and go to the Mullvad connection check page so you can confirm that the change actually took effect.
If a website asks you to verify your identity again after the change, do not worry. It is simply seeing Mullvad's IP address instead of the one linked to your usual connection, so it asks you to confirm that you are really the person behind the account.
What to choose as your location
Personally, for everyday web browsing and app use, I suggest choosing the closest server in your own country. This still gives you the privacy benefits of a VPN without greatly increasing the chance of triggering a location alert.
This is worth keeping in mind because some websites, especially banks and government services, may block access or trigger security alerts when they detect a connection from an unusual location.
6. Understand the kill switch
Okay, now it's time to talk about Mullvad's kill switch.
..."Kill switch? What the hell is a kill switch?" you may be asking.
Good question, let's quickly unpack it.
In a VPN, the kill switch is a really useful feature designed to prevent your traffic from quietly falling back to the ordinary network path while the VPN is connected or trying to reconnect. This is especially valuable when avoiding accidental traffic outside the tunnel matters more to you than staying online every second.
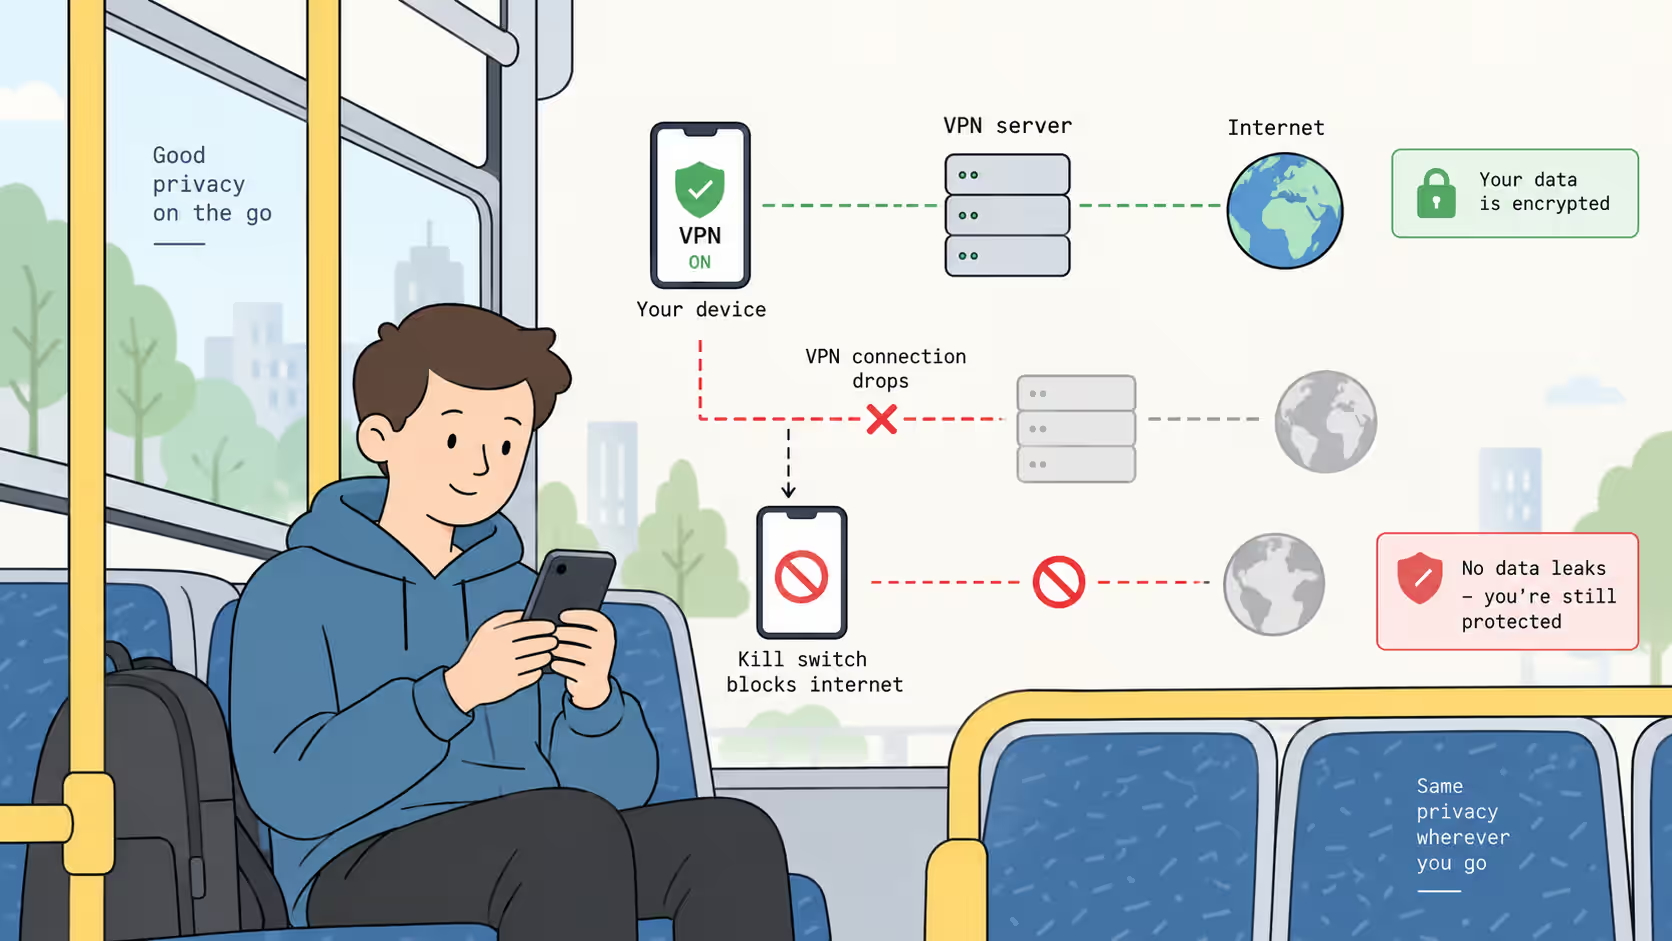
For example, if the selected VPN server is temporarily unreachable, Mullvad may block traffic instead of silently sending it through your carrier or Wi-Fi network without protection. In most privacy-focused situations, that is the preferable failure mode.
However, it can be inconvenient when you need to reach a local printer, complete a captive-portal sign-in, or access another service on your local network.
If the Internet stops working after a failed connection, open Mullvad and check its state before changing unrelated phone settings. You can intentionally disconnect the VPN when you need to use the normal connection.
Alternatively, choose another server and try again if you want to remain protected while troubleshooting the original connection.
Try not to disable this protective behavior merely to make a connection test appear successful. First, work out whether the problem is caused by a network that blocks VPN traffic, an unavailable server, an incomplete captive-portal sign-in, or a local firewall rule, because each of these situations calls for a different solution.
Should you use the kill switch?
Well, it depends. For a normal user, it is perfectly reasonable to leave the kill switch disabled. If you mainly use Mullvad for everyday browsing and standard app use, you probably do not need the absolute maximum level of privacy at all times, and keeping your normal connection available can be more convenient when the VPN cannot connect.
However, if your priority is the absolute maximum privacy possible and you do not want any traffic to leave your device outside the VPN tunnel, enable the kill switch and accept that it may interrupt your Internet access until Mullvad reconnects or you disable it yourself.
7. Configure useful app settings
The Mullvad's app default settings are suitable for the vast majority of users, and there is no need to change every option just because you can.
Having said that, a few settings are worth understanding, particularly if you use the VPN on several networks or discover that a local device, website, or app behaves differently after the tunnel is enabled.
Start or connect automatically
If your version of the app provides an automatic connection option, enable it when you want Mullvad to connect whenever your phone joins a network.
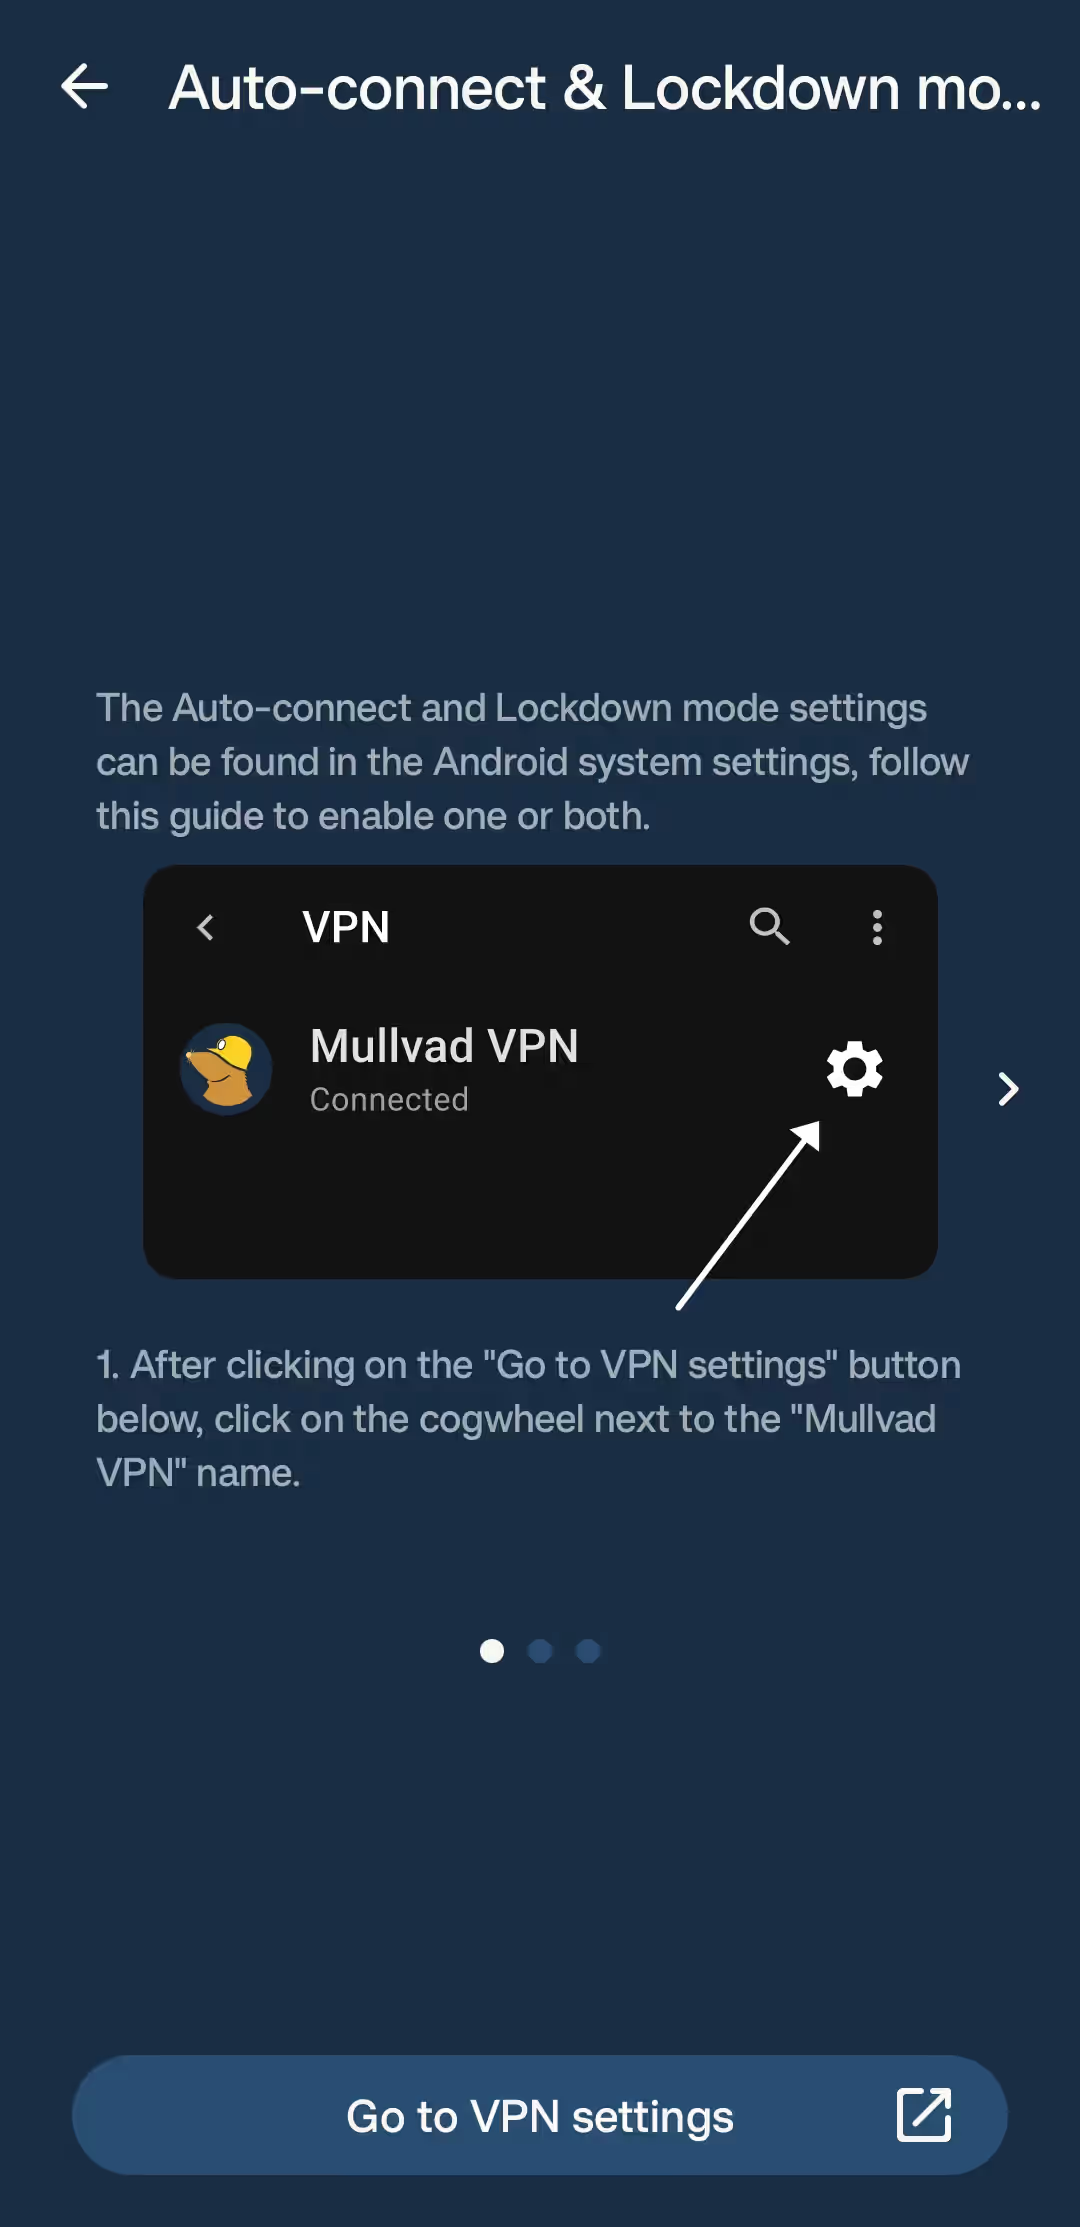
This can be very convenient at times, especially when you regularly use public Wi-Fi, or if you simply don't always trust the network you're connecting to.
Local network sharing
Mobile devices often need to communicate with more than just the public Internet: perhaps you want to print a document, cast a video, reach a media server, or connect to another device in your home.
If one of those local resources becomes unreachable while Mullvad is active, look for the app's local-network sharing or local-network access setting. As always, bear in mind that the exact name and availability of the option depend on your platform and app version, and can also change with future updates.
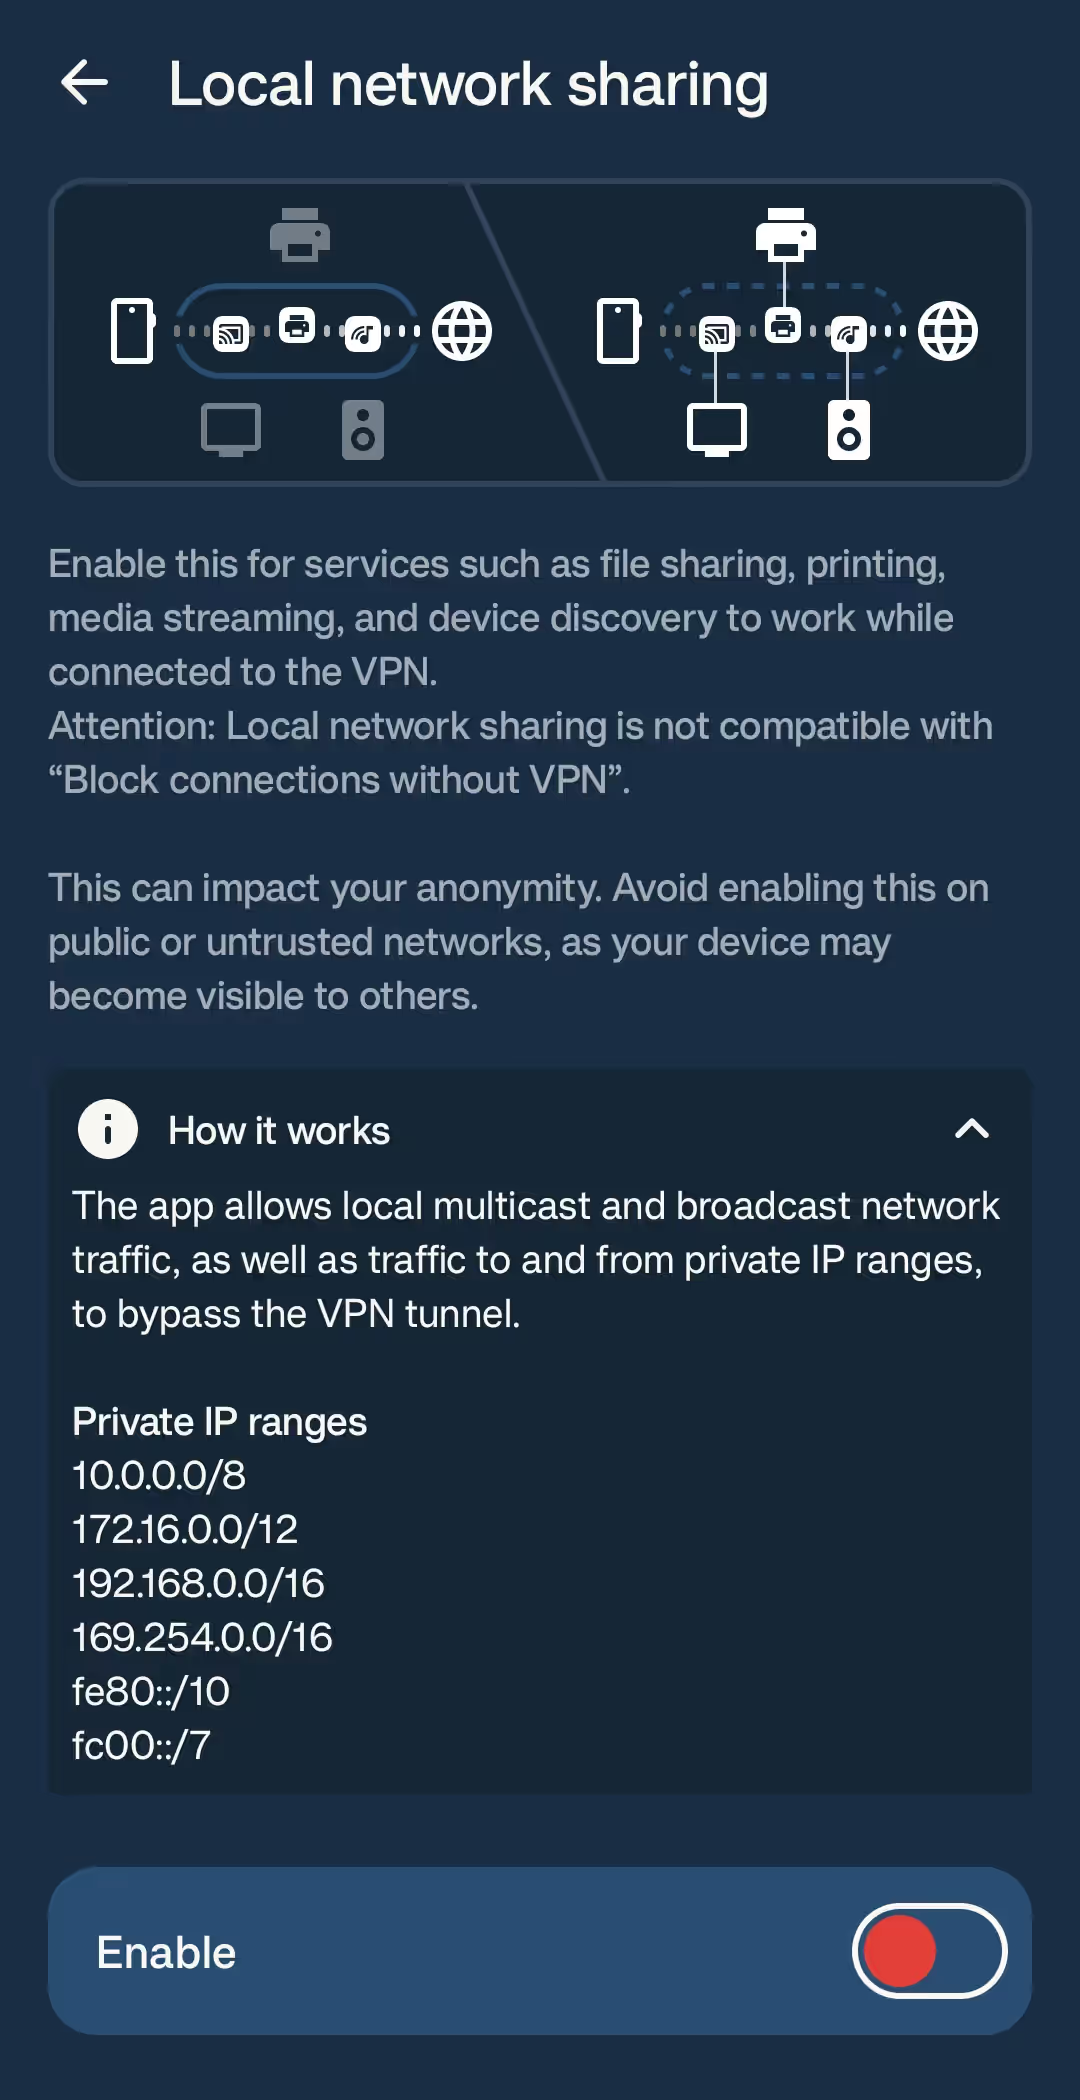
When you do need an exception, enable the smallest one that solves the problem and then test the local service again. Allowing local-network access does not automatically send all Internet traffic outside the VPN, but it does change which network paths your device is allowed to use, so it is worth knowing exactly what you have enabled.
VPN protocol
Depending on the platform and app version, Mullvad may expose several protocol choices in its settings.
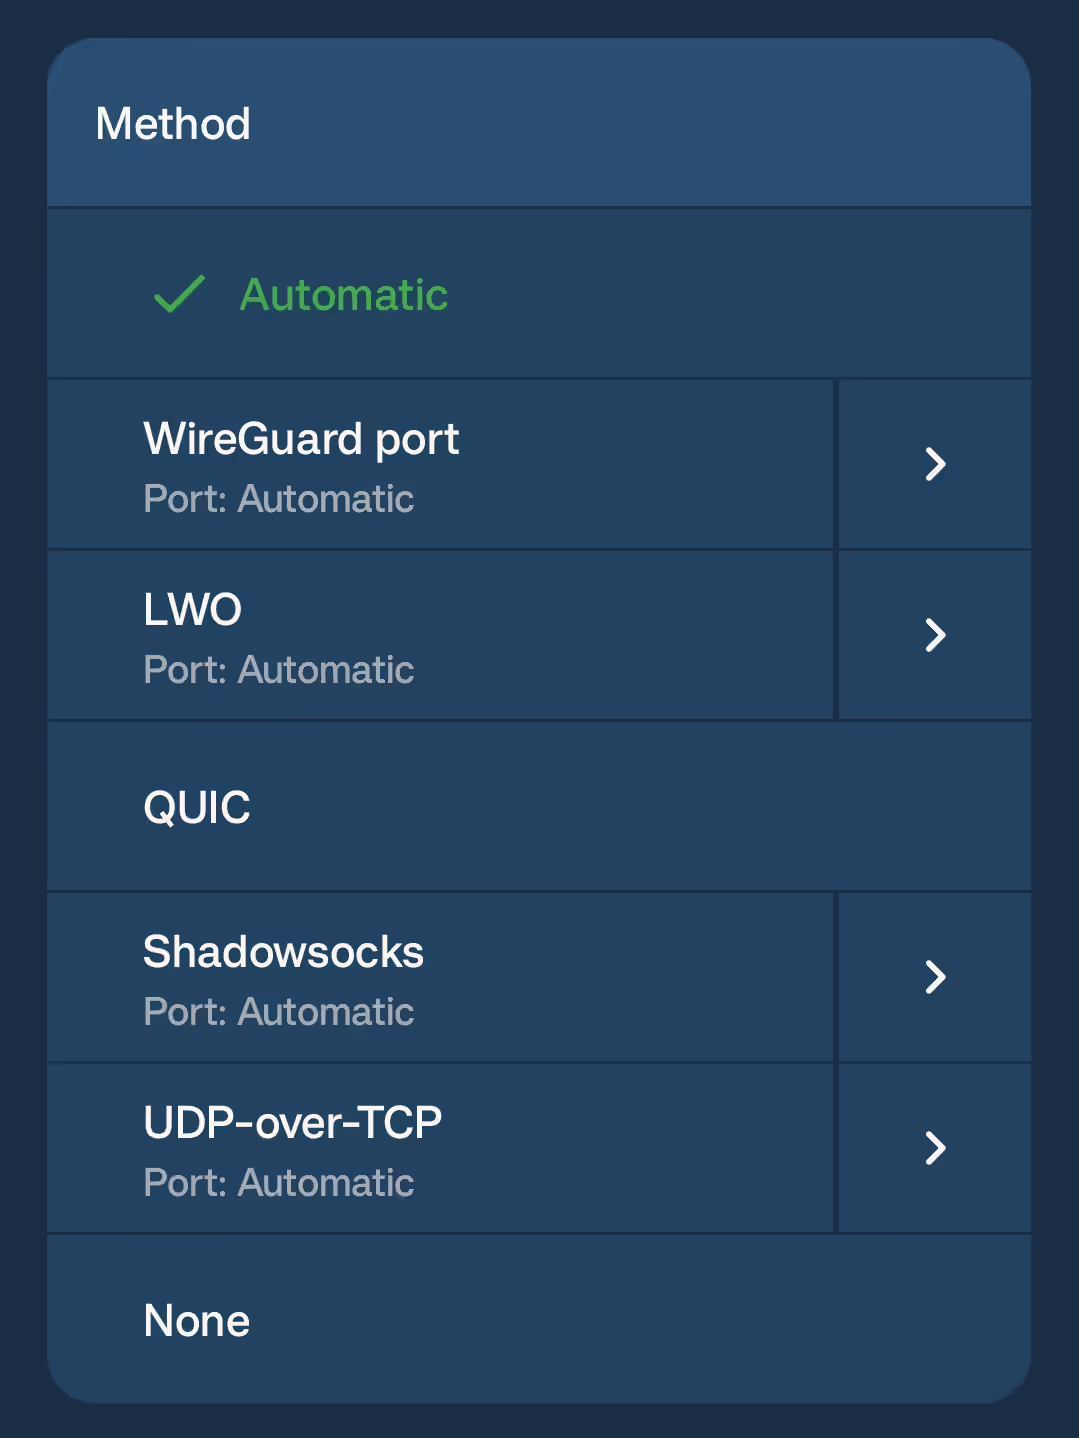
WireGuard is commonly the default option, given it modernity and efficiency, so I would suggest you leave it in place unless you have a reason to investigate a connection problem or you actually wanna change it for some other reason.
If a particular network blocks or interferes with the default protocol, note the original setting first, try another available option, and compare the results rather than changing several things at the same time.
DNS settings
The VPN connection also handles DNS requests, although the exact choices available to you depend on the installed app version and chosen platform.
One really useful feature of Mullvad's DNS is that you can choose which types of requests it should block. You can block requests to advertising and tracking services, malware domains, and adult sites.
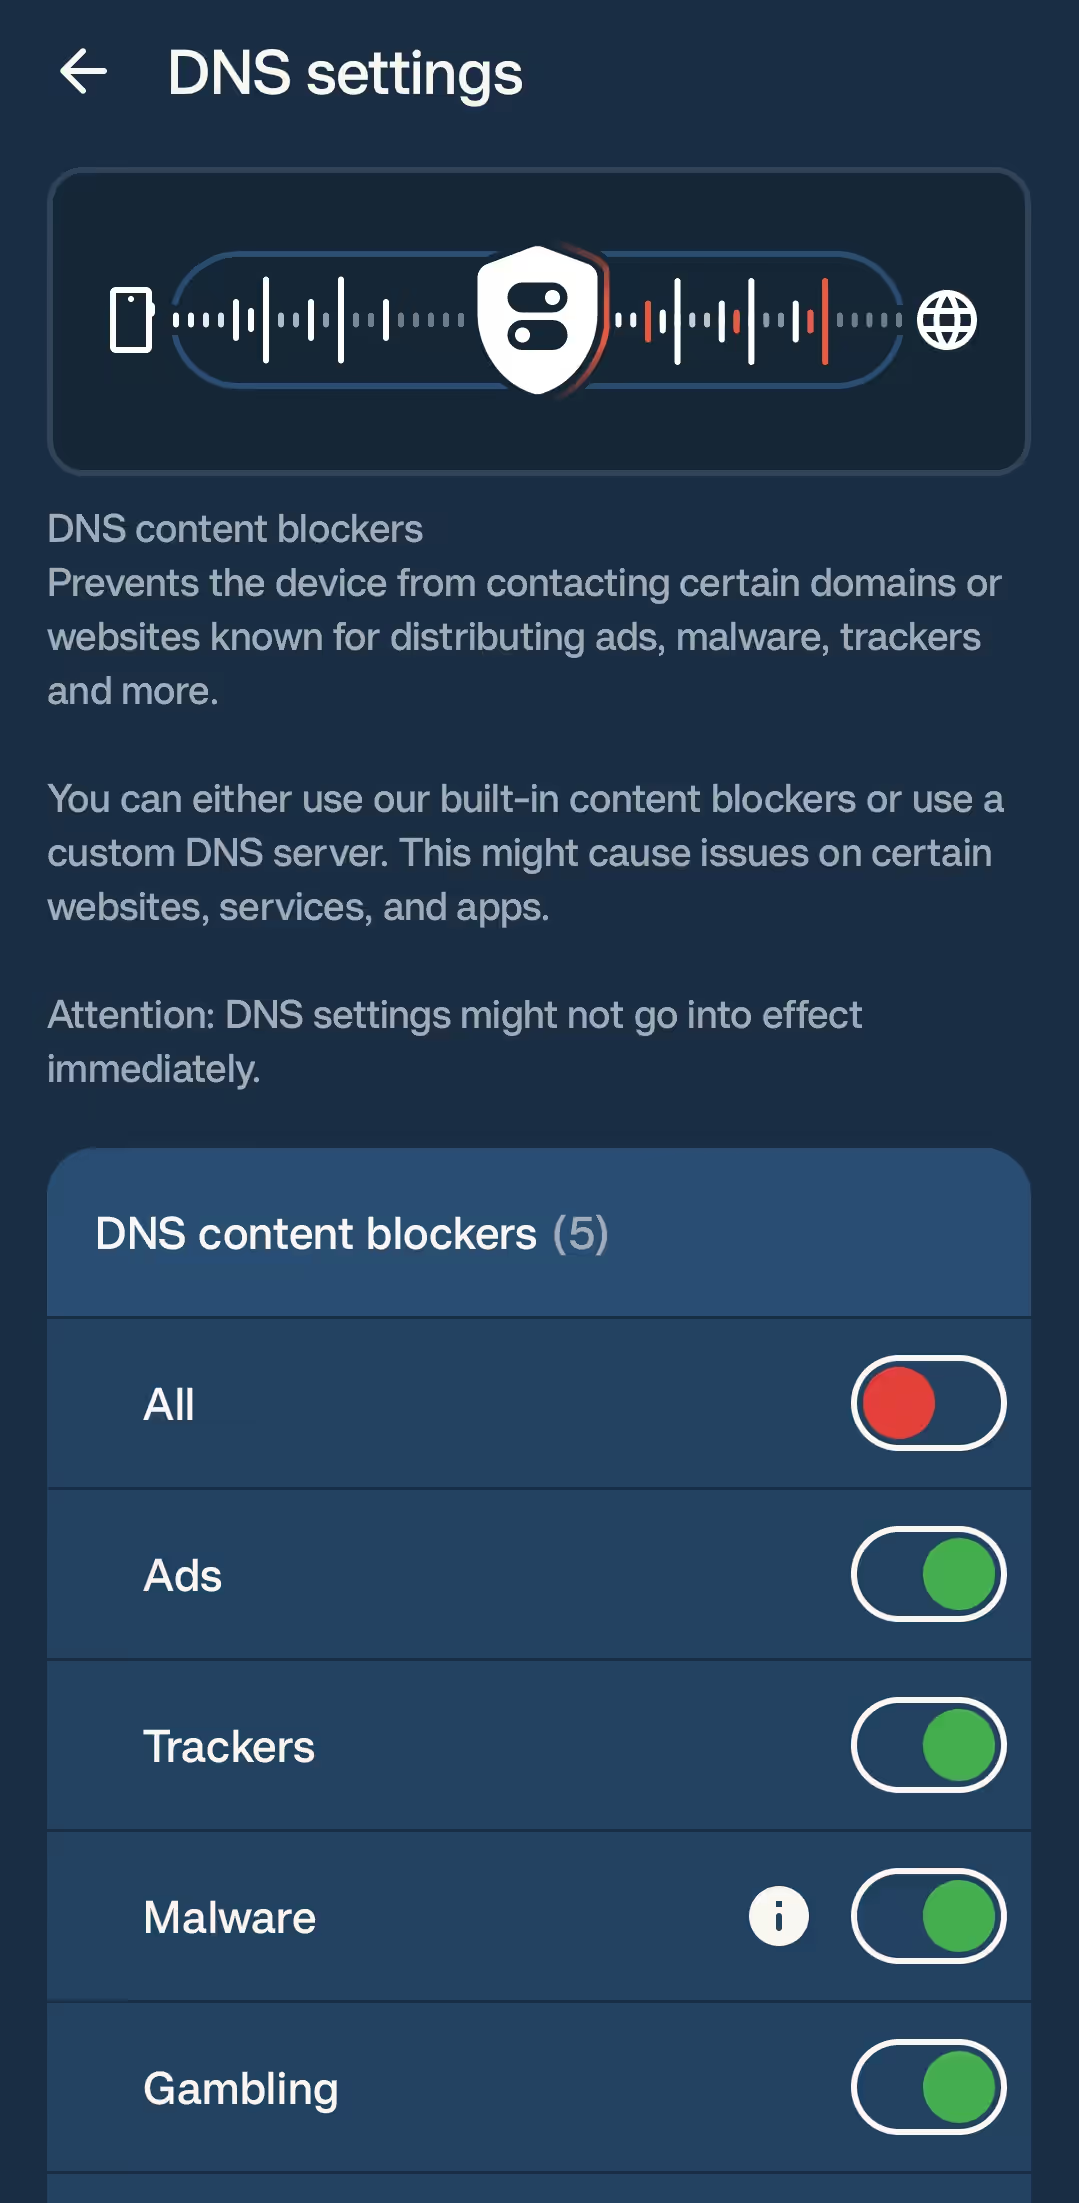
These filters are useful, but they can sometimes interfere with websites that depend on one of those services, making a perfectly healthy connection look broken.
When a page behaves strangely, temporarily test it with a less restrictive DNS setting and see whether the problem disappears. Make one change at a time so you can more easily identify the cause, and once you understand what happened, restore the level of protection you actually want to use.
8. Use Mullvad on Wi-Fi and mobile data
A VPN that works on your home Wi-Fi but fails as soon as you leave the house is, as you can imagine, not a very useful VPN.
So, it's definitely better to test Mullvad on both Wi-Fi and mobile data before assuming that everything is configured correctly. Different networks can filter traffic, handle DNS differently, or impose restrictions that are invisible when you test just a single connection.
Public Wi-Fi
Many public Wi-Fi networks require you to accept some sort of terms of service or sign in through a captive portal before they allow you to access the Internet through their network. If Mullvad cannot connect in a hotel, airport, or café, disconnect it briefly, complete the network's sign-in process, and reconnect Mullvad as soon as you are online.
Use this approach carefully, and keep the unprotected period as short as possible. Complete only the captive-portal step, avoid entering sensitive information or browsing unnecessarily before reconnecting, and verify the connected state again once Mullvad is back on.
Mobile data
To test your mobile data connection, turn off Wi-Fi and check whether Mullvad can establish a tunnel through your carrier. If it cannot, try another nearby server or an available protocol, and check whether your carrier or current mobile network is known to restrict VPN traffic before changing more settings.
On Android, some manufacturers apply aggressive battery-optimization rules that can stop Mullvad or disconnect it while the phone is locked to conserve battery when the level is too low.
If that happens, follow Mullvad's Android background-running guidance and allow the app to run normally in the background instead of assuming that the VPN itself is unreliable.
On iOS, the operating system manages background activity more strictly, so keep the app updated and check its status after switching networks or waking the device. The important habit on either platform is the same: after a network change, take a moment to confirm that the VPN is still connected before trusting it with your traffic.
Troubleshooting
When something inevitably goes wrong, resist the temptation to change five settings at once, because that may make the problem disappear without telling you what caused it.
Most mobile VPN problems become much easier to understand when you change one variable at a time and pay attention to whether the failure happens during login, server selection, connection, or ordinary browsing.
Here's a quick checklist if you find any issues while using the Mullvad VPN:
- If the app cannot log in, check the account number carefully and confirm that the account still has time available before investigating network settings.
- If no server connects, confirm that ordinary Wi-Fi or mobile data works first, then try a different nearby server or an available protocol.
- If the app connects but websites do not load, look for a captive portal and then review the selected server, DNS, and protocol settings one at a time.
- If only one app fails, inspect that app's network permissions, proxy settings, and any VPN bypass or split-tunneling option before blaming the tunnel.
- If the VPN disconnects when the screen locks, review Android battery optimization and any background restrictions added by the device manufacturer.
- If local devices cannot be reached, review local-network sharing settings and confirm that the printer, server, or other service works without the VPN.
- If the public IP does not change, disconnect any other VPN, proxy, or private-relay service before testing Mullvad again.
Restart in a controlled order
If finding the cause of the VPN problem is driving you insane, you can follow the steps below one by one. This way, each step tells you something useful about the next one:
- 1Disconnect Mullvad.
- 2Confirm that ordinary Wi-Fi or mobile data works.
- 3Close and reopen the Mullvad app.
- 4Try a different nearby server.
- 5Reconnect and run the Mullvad connection check.
As mentioned earlier, avoid changing several settings at once. If the problem disappears afterward, you will not know which change fixed it, and you may leave unnecessary exceptions enabled simply because you never identified the original cause.
Captive portals and restricted networks
Some networks block VPN traffic until you accept their terms or authenticate through a browser page, which is why a VPN can appear to fail even though the phone itself is online.
Connect without Mullvad only long enough to complete the portal, reconnect immediately afterward, and test the tunnel. If the network consistently blocks VPN connections, try another network or an available Mullvad protocol instead of repeatedly changing unrelated phone settings.
Update before reporting a bug
Before reporting a problem to Mullvad, check whether a newer Mullvad app version is available through the same source you used for installation, since an update may already contain the fix or a more useful diagnostic message.
If you still need to contact support, note the device model, operating-system version, app version, network type, selected location, and exact error message, but never include your account number in a public bug report or screenshot.
Privacy and security advice
The VPN settings matter, but your everyday habits are even more important.
Here's a short list of best practices to follow when managing your Mullvad VPN app and its configuration:
- Install Mullvad only from the official app store or an official Mullvad download source, especially when an APK or configuration file is involved.
- Keep your account number private and store it somewhere secure, because anyone who has it may be able to use the account while time remains.
- Verify the VPN connection instead of assuming that the app is connected simply because it is open.
- Review local-network, DNS, and bypass settings after major app updates so that an old exception does not surprise you later.
- Keep your phone, browser, and Mullvad app updated, since the VPN cannot compensate for vulnerabilities elsewhere on the device.
- Remember that a VPN does not prevent tracking through accounts, cookies, browser fingerprinting, or information you voluntarily provide.
And most importantly, never install a configuration profile, certificate, or APK sent by an unknown person who claims it will provide a faster Mullvad connection. A VPN configuration gives software significant control over your network traffic, so the source and integrity of anything you install matter just as much as the VPN provider you choose.
Conclusion
So, here we are: we've finally reached the end of this guide!
The Mullvad VPN mobile app is pretty straightforward once you become familiar with the basic flow, and it can definitely be a great companion when it comes to improving your privacy and security!
If you have a very short memory or attention span, here's a quick recap of what we've learned so far:
- 1Create or locate a Mullvad account number and make sure it has time available.
- 2Install the official app for Android or iOS from a trusted source.
- 3Enter the account number and approve the device VPN permission when prompted.
- 4Connect to a suitable server and check that your public IP address changes as expected.
- 5Review the kill switch, DNS, protocol, and local-network settings when you have a specific reason to adjust them.
- 6Test the app on both Wi-Fi and mobile data before relying on it in unfamiliar networks.
For current platform requirements, payment options, and app-specific instructions, consult the Mullvad help center and the official Mullvad download page, since app behavior and installation requirements can change as Android, iOS, and Mullvad itself evolve.
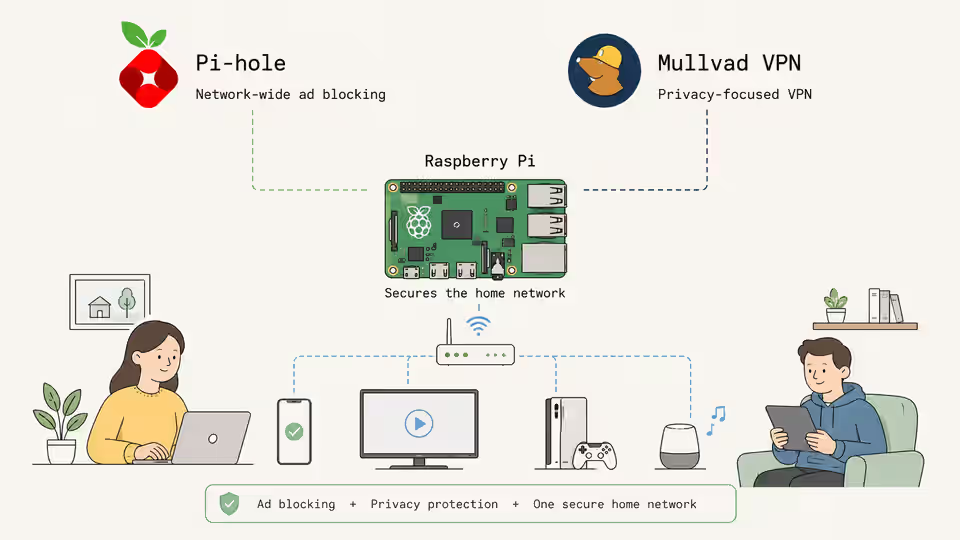
If you want to protect more than one phone or tablet and route traffic for your whole home network, you may also be interested in our guide to configuring Pi-hole and Mullvad on a Raspberry Pi! That setup turns the Raspberry Pi into a shared DNS filter and VPN gateway for your other devices!
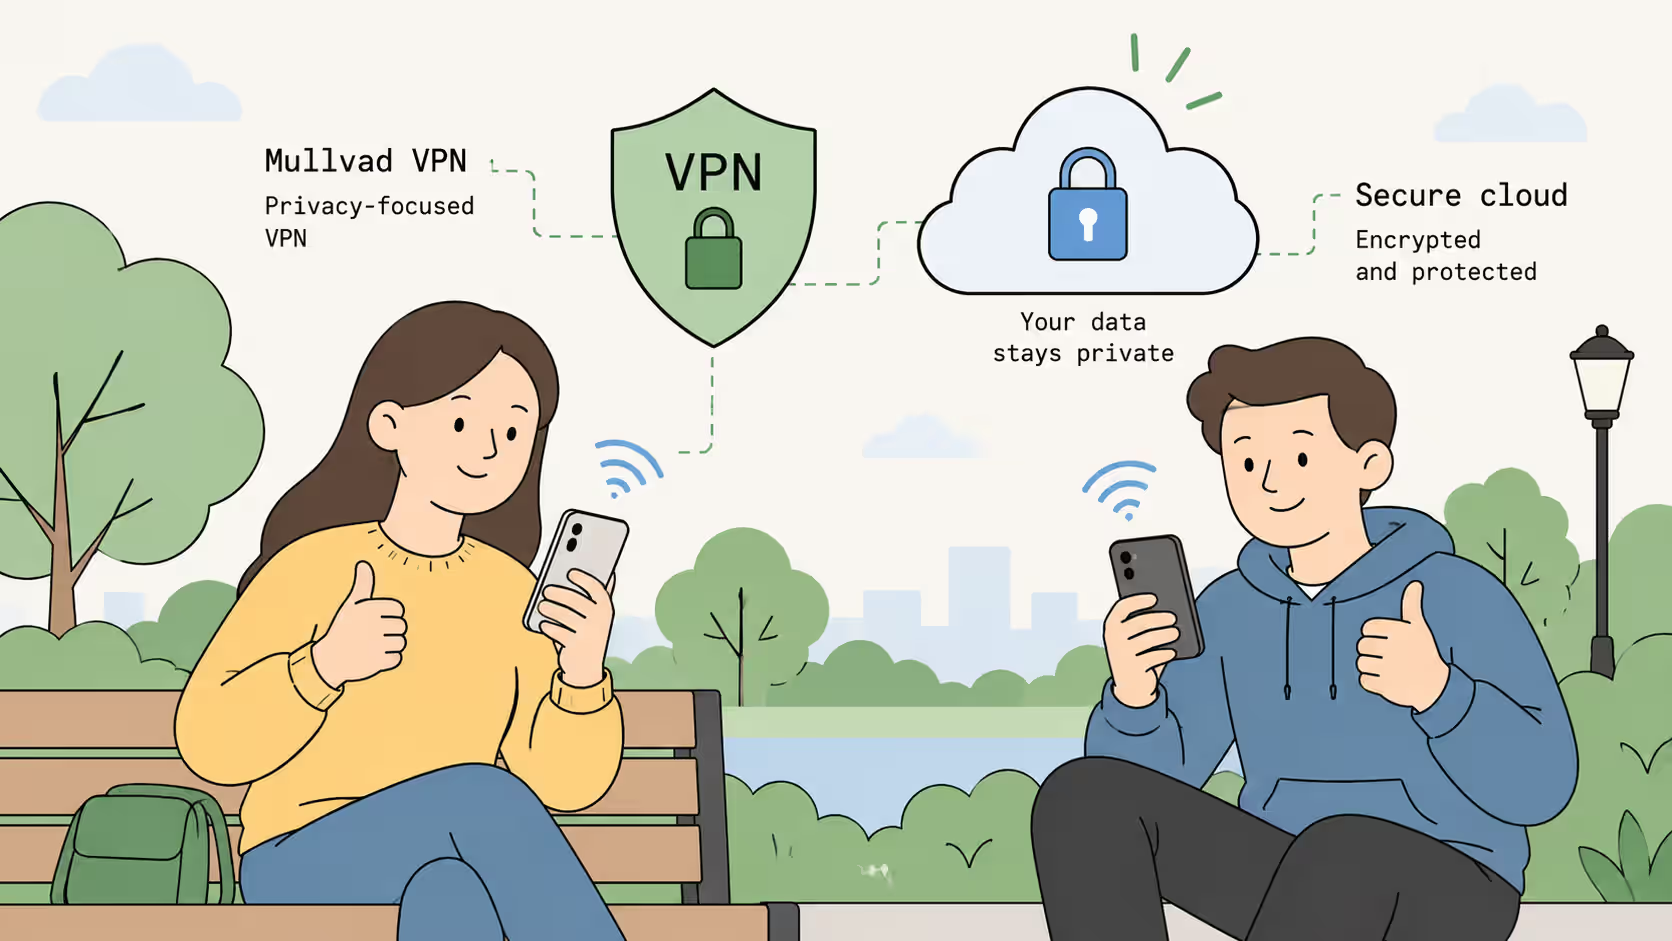
I hope you enjoyed the guide, and I hope to see you around again soon. Stay safe and enjoy a more private online experience!
Frequently asked questions
Find quick answers to the most common questions about this topic.
No. Mullvad uses a randomly generated account number instead of an email address and password. The account uses prepaid time, so make sure it has time available and store the number securely because anyone who has it may be able to use the account.
Do not assume that the app is protected just because it is open. Confirm the connected state in Mullvad, look for your phone's VPN indicator, and open Mullvad's connection check page. Compare the reported public IP address and location with the result from a test made while the VPN is disconnected.
No. Mullvad can encrypt the connection between your device and its VPN server and hide your public IP address from your ISP and the websites you visit, but it cannot prevent tracking through accounts, cookies, browser fingerprinting, malicious apps, or information you provide yourself.
The kill switch is intended to block traffic from falling back to the ordinary Wi-Fi or mobile-data connection while Mullvad is connected or reconnecting. This can prevent accidental exposure, but it may also interrupt Internet access or local-network services until Mullvad reconnects or you intentionally disconnect it.
For everyday use, start with a nearby server, since distance and network routing affect latency. Choose another country only when you need a different exit location, and compare servers with different loads when performance is poor. There is no universally fastest server.
Change one variable at a time. First confirm that ordinary Wi-Fi or mobile data works, then check for a captive portal, try a nearby server or available protocol, and run the connection check again. If the problem appears after the screen locks, review Android battery restrictions; if only a local device or one app fails, review local-network access, DNS, proxy, or VPN-bypass settings.

Author
Help me keep building!
Support my open-source work and help cover hosting, continuous security updates, and the tools that keep these projects moving. You can support me on Patreon or Ko-fi, with a recurring monthly contribution or a one-time donation. Every little bit helps, and I appreciate your support in keeping these projects alive and thriving!